Australia has no shortage of trails for a day hike, but the ones that go wrong usually go wrong for the same reason: preparation didn’t match the trail. This guide walks through the decisions that matter before you leave the car park, so you head out better informed and better prepared.
Step 1: Know your limits, be honest
Self-awareness matters here. Take an honest look at your fitness level, your experience, and any health conditions that might affect you on the day, and choose a trail that matches them rather than the trail you wish you were fit enough for. Pushing beyond your limits doesn’t just risk exhaustion. It’s how injuries happen, and how people end up lost.
Key considerations for planning a day hike
Fitness: Honesty is the Best Policy
- Be honest with yourself about your current fitness level. Recent activity levels and past hiking experience are valuable indicators.
- Pushing beyond your limits can lead to physical and mental fatigue, making you vulnerable to injury, dehydration, and getting lost.
- Overestimating your capacity can lead to muscle strains, joint injuries, or sprains, potentially turning your day hike into a rescue mission.
- Disregarding your fitness level can result in frustration, discouragement, and a negative perception of hiking. Don’t let an ambitious first attempt turn you away from this rewarding activity.
Choosing a trail suited for your current fitness level ensures a safe and enjoyable experience, allowing you to build your endurance gradually and explore nature at your own pace.
Experience: Building on Past Adventures
- Consider the type of terrain and challenges you’ve encountered before. Choose a trail that matches your previous experiences.
- Unfamiliar terrain and unexpected obstacles can be daunting, especially if you haven’t encountered them before, whether that’s loose scree for the first time on a difficult trail or a steep rocky section you don’t have the technical skills to cross safely.
- Choosing a hike beyond your past experience can leave you unprepared for technical sections, requiring assistance or putting yourself at real risk if a descent turns out to need skills you don’t have.
- Lack of experience also tends to show up in gear choices. I’ve seen hikers turn up for hikes in the alpine region without an outer layer or wet weather gear, and on one occasion, someone didn’t think they’d need a fly for their tent.
Selecting a trail and environment that aligns with your past adventures allows you to gradually progress your skills and confidence, ensuring you’re equipped and prepared for the challenges you’ll face.
Health: Awareness and Precautions
- Be aware of any medical conditions that may affect your performance or require specific precautions.
- Unmanaged health conditions, like asthma or allergies, can worsen due to exertion or environmental factors, potentially requiring medical intervention on the trail, a long way from help.
- Forgetting essential medication can significantly impact your performance and well-being during the hike. Running out of an inhaler during a strenuous climb puts you at real risk.
- Being upfront with yourself about health concerns beforehand, rather than pushing them to the back of your mind, means you get to enjoy the hike’s scenery instead of hiking distracted by worry.
By being aware of your health conditions and taking necessary precautions, you can ensure a safer hiking experience, allowing you to fully appreciate the natural wonders around you.
Step 2: Choose the right trail
Once you know your limits, the next job is matching a trail to them. Plenty of resources are available to assist you, including official park websites, hiking blogs, and guidebooks. Check maps and official sources where routes are verified, graded, accurate and up to date, and be wary of crowd-sourced data, which can sometimes be unreliable and inaccurate.
Selection criteria
Grade: Too easy, too hard or just right?
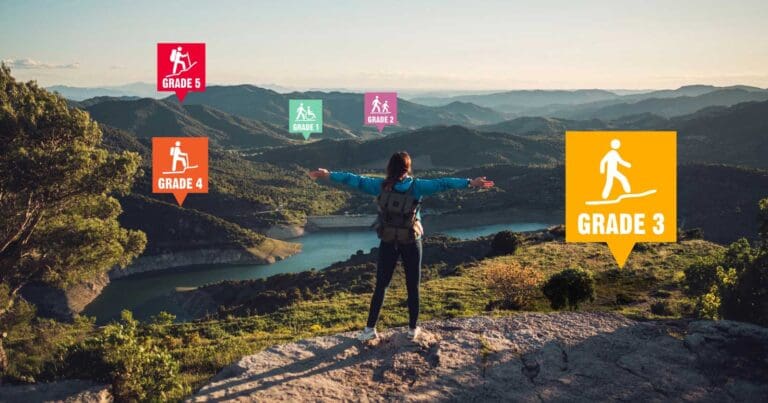
In Australia, trails are typically categorised by difficulty using a nationally consistent grading system known as the Walking Track Grading System, so choose a grade that aligns with your capabilities and experience from Step 1. Go too hard and you risk exhaustion, injury, getting lost, or needing rescue, particularly if a steep climb runs you out of energy with nightfall closing in. Go too easy and the risk shifts: boredom and missed scenic opportunities, but also less attention paid to your surroundings, which is exactly when observation as a hiking skill slips and something goes unnoticed.
Length and Elevation Gain:
Consider the total distance and elevation gain, keeping your fitness level in mind, and plan for rest breaks and slower uphill or downhill sections. Not accounting for the length and duration of the hike is how people end up dehydrated, exhausted, or caught out after dark with fading light and not enough energy left to finish safely. Underestimating elevation gain has a similar effect: steeper climbs than you planned for leave you breathless and struggling, with less attention left for the walk itself.
Terrain:
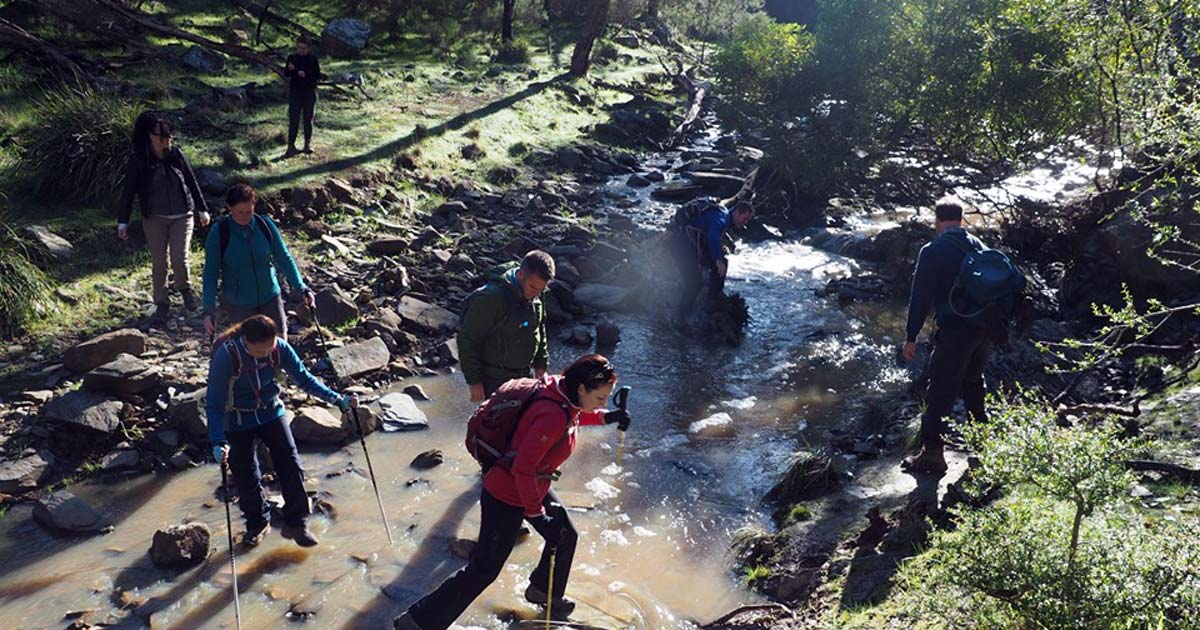
Be aware of the terrain type. Rocky paths, loose scree, or river crossings may require additional skills or equipment, and unfamiliarity with them is how falls, injuries, and equipment damage happen. It shapes gear choices too. I’ve seen people tackle a rocky scramble in flimsy sandals, risking twisted ankles and a lost grip that proper footwear would have prevented.
Facilities:
Determine if toilets, water access, or mobile phone reception are available, and pack accordingly if amenities are limited. Neglecting to check water availability is how people end up dehydrated halfway through a hot day, and not knowing about toilet facilities can leave you unprepared and uncomfortable. Assuming phone reception without checking can leave you isolated if you need to call 000, and the same risk applies to relying on a phone app to navigate if the battery fails or the map won’t load.
Weather:
Research the expected weather conditions, including potential for rain, high winds, snow, or extreme temperatures. Choose a trail suitable for the forecast and be prepared to change or cancel your plans if conditions worsen. Rescues occur often in extreme temperatures, usually because the planning didn’t account for the forecast, and underestimating wind or lightning carries real danger, particularly on an exposed peak where there’s nowhere obvious to shelter.
Working through these criteria before your hike is what turns a good idea into an actual plan you can rely on for the day.
Step 3: Gear selection
I’ve covered day hike gear in full, including why each item matters, in my Day Hike Packing List guide, so I won’t repeat it item by item here. The short version: pack for navigation, hydration, sun and weather protection, first aid, food, a light source, and emergency communication, and match all of it to the terrain, forecast, and distance rather than habit.
What’s worth covering here is what you do with your waste on the trail, because it’s easy to overlook. Plan to bring all your trash, food scraps and waste back with you, even biodegradable items like fruit peels, and dispose of them properly once you leave the trail. Leave No Trace and leave nature how you found it.
Human waste is part of that. If toilets aren’t available, practise Leave No Trace principles for human waste: dig a cathole 15-20 cm deep at least 100 metres from water sources and trails, bury the waste and toilet paper, then disguise the hole with soil and leaves. Dispose of sanitary products and feminine hygiene items responsibly by packing them out for proper disposal.
Step 4: Let someone know your plans
Inform a trusted friend or family member about your planned hike. This simple step of letting someone know before you go can be important in case of unexpected delays or emergencies. For shorter, less challenging hikes, as a minimum include:
- The official trail name and location
- Your expected start and finish times
- Who you are going with (if anyone)
- Your emergency contact information
For longer, more challenging and remote adventures, complete an online trip intentions form. You can use the one I’ve prepared here.
After your hike, make sure you let your contact/s know you have returned so they don’t accidentally raise the alarm.
Step 5: Preparing an emergency plan
Anticipate potential challenges, pack accordingly, and plan for what could go wrong. Conducting a thorough hiking risk assessment before setting out on any hiking trip helps you identify potential hazards and develop strategies to manage those risks.
- Know the official trail and park name: Accurately knowing the track you plan to hike and the park it resides in allows for clearer communication with emergency services or search and rescue teams if needed.
- Plan your route: Use a scaled topographic map or download and study official trail maps, highlighting your planned route and key points of interest. Mark alternative routes or escape options in case of unforeseen obstacles.
- Identify key topographic features: Familiarise yourself with the elevation profile, steep sections, and any significant landmarks or points of reference visible from the trail. Understanding topographic features and the terrain helps with navigation and anticipating potential challenges.
- Know any water procurement points: If natural water sources like streams are present, research their safety for drinking and plan accordingly. Carry water treatment tablets or filters if relying on natural sources. If you don’t have any way to purify water, don’t be afraid to drink from rivers and streams if you are becoming dehydrated. I’ve been on search and rescue incidents where hikers had called for help, extremely dehydrated, standing next to a river.
- Learn the names of intersecting tracks or roads: Knowing connecting trails or nearby roads provides alternative options or potential evacuation routes if needed.
- Identify possible emergency evacuation/extraction points: Research potential exit points like helicopter landing zones or mark management access tracks that could be important in case of serious injury or emergency situations.
- Review first-aid skills: Refresh your memory on basic first-aid procedures relevant to hiking injuries like blisters, sprains, and cuts. Consider carrying a more comprehensive first-aid and survival kit if venturing into remote areas.
- Practise using your navigation tools: Before your hike, practise using your map, compass, and any GPS device you might be carrying. Get comfortable with basic navigation techniques so you’re not learning them for the first time on the trail. There’s no point carrying gear if you don’t know how to use it.
- Conduct a risk assessment: Don’t just rely on general safety tips: tailor your preparation to the specific risks of your chosen hike and the Australian environment. For a detailed guide on conducting a risk assessment specifically for your Australian hike, head over to my dedicated blog post.
- Emergency procedures: Familiarise yourself with local emergency procedures and phone numbers (000 in Australia). Download helpful resources like offline maps or park safety guides.
Preparing for potential setbacks and gathering detailed information about your chosen trail increases both your safety and your peace of mind, which frees you up to focus on the hike itself rather than second-guessing it. Even a small investment in preparation can significantly enhance your safety on the trail.
Time commitment for day hike planning
A quick word of caution first: mobile app use is now the top reason people become lost in the bush. A hiking app can be a helpful starting point, but don’t rely on it alone. Time spent on proper planning, not just trusting an app, is what prepares you for the actual challenges of the day, helps you choose a suitable trail, and lets you make informed decisions once you’re out there.
The amount of time you’ll need to invest in planning your day hike doesn’t have to be an all-day affair. It varies depending on several factors, including:
- Hike difficulty: Naturally, more challenging trails (Grades 4-5) generally require more research and preparation.
- Length and duration: Longer hikes may involve more logistical considerations and potential challenges to anticipate.
- Weather: Researching specific weather forecasts and packing accordingly requires additional time.
- Remoteness of the trail: Understanding access, facilities, and potential communication limitations in more remote areas is important.
Here’s a general starting point, keeping in mind the factors above will shift it up or down:
- Easy Day Hikes (Grade 2): 45 minutes – 1 hour
- Moderate Day Hikes (Grade 3): 1 – 2 hours
- Hard Hikes (Grade 4): 2 – 3 hours (consider adding more time for thorough research, especially if unfamiliar with the area)
- Difficult Hikes (Grade 5): 4+ hours (extensive research highly recommended)
These are starting points, not rules. The actual time you spend planning will depend on your personal research style, familiarity with the area, and desired level of detail. Don’t hesitate to invest more time, especially for higher difficulty hikes or unfamiliar regions.
I know this seems like a lot, particularly if you’re new to hiking. But planning a hike is part of the journey, and it’s never felt like a chore to me. How much time you put into it is up to you, but improper planning is what leads to situations requiring search and rescue assistance, and that draws resources away from other emergencies. Time spent planning is what keeps a hike safe, enjoyable, and self-sufficient, and it’s what determines how confident you feel standing at the trailhead before you start walking.