The Way of the Legends Through the Italian Dolomites
Julie and I hiked the incredible Alta Via 2 in June 2026. This guide brings together on-trail experience with the practical detail required to plan the route properly, including timing, logistics, costs, accommodation, water availability, navigation, fitness requirements, and safety considerations. It is intended as a planning reference rather than a day-by-day narrative.
We completed the route early in the season, just as many of the rifugi were opening for summer. That timing shaped the experience in ways we did not fully expect. We carried gloves, thermals, waterproofs and insulated layers for the high mountains, but many days were warm enough to walk in shorts and T-shirts. The heat and humidity also meant we needed more water than anticipated, and we regularly filtered water from streams where it was available.
Our chosen itinerary, including variants, hut approaches and the final descent, came in at around 196 kilometres, with more than 11,000 metres of climbing through the Italian Dolomites.
For us, this was not just another hike. The Alta Via 2 tested us every single day, with steep climbs, long descents, exposed traverses, via ferrata sections, loose scree, unpredictable weather, and days where progress came down to simply putting one foot in front of the other. We have been fortunate to complete some amazing hikes over the years, but this was the toughest and most technically challenging trek we have ever done.
We completed the trek in 12 days, including several via ferrata side-trips, but the itinerary below follows the more common staged structure so you can adapt it to your own pace, bookings and comfort level.
1. Overview of the Alta Via 2
The Alta Via 2 (AV2), commonly referred to as the “Way of the Legends,” is one of the most demanding long-distance routes in the Italian Dolomites. Stretching approximately 160 to 180 kilometres from Bressanone (Brixen) to Feltre, the trail follows the central spine of this UNESCO World Heritage mountain range.
Often described as the wilder counterpart to the Alta Via 1, the AV2 requires a higher level of technical competence and physical endurance. While the AV1 is characterised by gentler gradients and a denser network of well-appointed huts, the AV2 involves sustained climbing, significant exposure, and frequent use of cable-protected routes. The trail crosses eight major mountain groups, including the Puez–Odle, Sella, Pale di San Martino, and the remote Vette Feltrine.
The defining feature of the Alta Via 2 is its combination of extreme vertical relief and cultural history. The route traverses terrain shaped by ancient marine geology and later scarred by the high-altitude battlefields of the First World War. Walkers spend extended periods above 2,500 metres, negotiating narrow ledges, steep scree, and via ferrata sections where exposure is significant. This is a sustained alpine undertaking that demands confident movement, careful judgement, and respect for rapidly changing mountain conditions.
2. Key Facts at a Glance
For those planning the logistics of such a journey, the technical data provides a clear picture of the physical toll. The AV2 is characterised by “sawtooth” elevation profiles, where you will frequently drop 1,000 metres into a valley only to climb it back again within the same afternoon.
| Statistic | Requirement / Data |
| Total Distance | 160 km to 196 km (depending on variants) |
| Typical Duration | 11 to 14 days |
| Trail Type | Point-to-point (north to south) |
| Total Elevation Gain | Approximately 11,400 m |
| Total Elevation Loss | Approximately 11,300 m |
| Highest Point | 2,932 m (Passo delle Farangole) |
| Lowest Point | 324 m (Feltre) |
| Difficulty Level | Grade 5 (technical and very demanding) |
| Typical Daily Walking | 6 to 8 hours |
| Via Ferrata Sections | Several (cables, ladders, and rungs) |
| Best Season | Early July to mid-September |
| Accommodation | Mountain huts (rifugi) |
3. Where the Trek Is and How to Get There
The Alta Via 2 is located in the northeastern corner of Italy, primarily within the South Tyrol, Trentino, and Belluno provinces. For Australians flying into Europe, the logistics of reaching the start are relatively straightforward, thanks to Italy’s efficient rail and bus networks.
Reaching Bressanone (Brixen)
The trek begins in the medieval town of Bressanone. If you are arriving from international flights, your best hubs are Venice (Marco Polo Airport), Munich, or Innsbruck.
- From Innsbruck: A direct train takes roughly 1.5 hours over the Brenner Pass.
- From Venice: You can take a train via Verona or a direct bus service. The journey takes approximately 3.5 to 4.5 hours.
- The Trailhead: The official route starts at the valley station of the Plose Gondola in Sant’Andrea. A local bus runs frequently from the Bressanone train station to the gondola. While purists may walk from the town, most hikers take the gondola to Valcroce (2,050 m) to save their knees for the 13 days of climbing ahead.
Finishing at Passo Croce d’Aune or Feltre
Many hikers treat Passo Croce d’Aune, a high pass above Feltre, as the practical finish of the mountain section of the Alta Via 2. From there, a bus can take you down to Feltre. Others continue walking all the way into Feltre, which is commonly listed as the southern endpoint of the AV2. Feltre has a train station with direct connections to Treviso and Venice, making it easy to catch a return flight or continue your European travels. If you have left gear in Bressanone, the return journey involves a train to Trento followed by a connection north to Bressanone.
✈️ Find flights →
🚗 Compare car hire →
4. Best Time to Hike and Seasonal Conditions
Timing is critical in the Dolomites. Unlike many Australian alpine areas where heat or bushfire may be the primary concern, the principal hazards on the Alta Via 2 are lingering snow, lightning, and violent afternoon thunderstorms.
The Hiking Window
The season is strictly governed by the opening dates of the mountain huts (rifugi), which typically operate from late June to late September.
- June: Many hikers attempt to start in mid-June, but this is risky. High passes such as Forcella della Roa often hold deep snow well into July. In some years, these sections may require winter skills, traction, an ice axe, crampons, or a safe alternative route. Conditions vary significantly from season to season, so check with the rifugi, local guides, and current weather reports before committing to an early-season start.
- July & August: This is the peak season. The weather is warm, and the wildflowers are in full bloom. However, this is also the season of the “afternoon storm.” Heat builds in the valleys, resulting in sudden, violent thunderstorms (often around 2:00 PM or 3:00 PM) that bring lightning, hail, and a 20-degree temperature drop.
- September: Generally considered the best month. The air is stable, the visibility is crystal clear, and the storms are less frequent. The trade-off is shorter daylight hours and the risk of the first autumn snow dump, which can close the trail overnight.
Our June experience: We began early in the season, when many rifugi were only just opening. While lingering snow is the obvious concern at this time of year, warmth was just as significant for us. Several days were much hotter and more humid than expected, particularly on the long climbs and lower valley sections. We still needed to carry full alpine layers for cold, storms and exposed high passes, but much of our walking was done in shorts and T-shirts. Early-season hikers should be prepared for both conditions: snow and cold on high passes, but also heat, humidity and strong sun during the day.
Temperature and Exposure
At elevations of 2,500 metres, temperatures can vary wildly. On a sunny day, the reflection off the white limestone is intense, and you will feel the heat. Conversely, if a front moves in, temperatures can drop to near freezing even in mid-August. You are often walking on high plateaus with no tree cover for hours, meaning you are fully exposed to whatever the sky decides to deliver.
5. Track Conditions and Terrain
The terrain of the Alta Via 2 is a sensory overload of rock. If you are used to the soft forest floors of the Dandenongs or the sandy tracks of the Great Ocean Walk, the AV2 will be a shock to the system.
The Nature of Dolomite Rock
The mountains are composed of magnesium-rich limestone (dolomite), which is incredibly beautiful but also very abrasive and prone to erosion.
- Scree Slopes: You will spend a significant amount of time on “ghiaia” (scree). These are slopes of loose rocks that act like ball bearings under your boots. Descending them requires a specific technique, similar to skiing, and puts immense strain on the quadriceps.
- Limestone Pavements: On the Sella and Rosetta plateaus, you will walk on vast, flat expanses of rock. While the grip is excellent when dry, this rock becomes like ice when wet.
- Via Ferrata and Cables: The AV2 includes sections of “equipped” trail. This means that in places where the path becomes too narrow or steep for a standard walk, steel cables are bolted into the rock. You will use these as handholds, and in some cases, you will need to clip in with a harness and lanyard for safety.
Verticality
The AV2 is defined by its verticality. You are rarely on flat ground. The trails are engineered to follow natural ledges (balcony paths) that hug the cliffs. This provides world-class views but means that for much of the trek, you will have a rock wall on one side and a 500-metre drop on the other.
6. Daily Distances and Typical Itinerary
The standard traverse of Alta Via 2 is broken into 13 stages. While very fit hikers may choose to combine certain days, the sustained elevation gain and technical terrain mean that following the traditional stage structure allows for safer pacing and a more enjoyable experience of both the landscape and the rifugio culture.
Stages 1 to 4: The Northern Massifs
These opening stages traverse the Plose and Puez–Odle groups, starting on rolling alpine pastures before transitioning to steeper limestone terrain with dramatic rock formations.
| Stage | Route | Distance | Ascent / Descent | Notes |
| 1 | Bressanone to Rifugio Plose | 7 km | +900 m | Short opening day, especially if using the gondola from Bressanone. Ideal for beginning acclimatisation. |
| 2 | Rifugio Plose to Rifugio Genova | 13 km | +550 m / −700 m | Scenic crossing beneath the Sass de Putia, with a mix of open meadows and rocky traverses. |
| 3 | Rifugio Genova to Rifugio Puez | 10 km | +850 m / −670 m | The terrain becomes more serious as the route crosses the Forcella della Roa. |
| 4 | Rifugio Puez to Rifugio Pisciadù | 10 km | +750 m / −630 m | Includes the descent to Passo Gardena followed by the steep, cable-assisted climb through Val Setus. |
Stages 5 to 8: The High Plateaus and the Queen
This section crosses the Sella Massif and moves toward the Marmolada, the highest peak in the Dolomites.
| Stage | Route | Distance | Ascent / Descent | Notes |
| 5 | Rifugio Pisciadù to Rifugio Castiglioni Marmolada | 16 km | +750 m / −1,280 m | Long, exposed traverse across the Sella Plateau with a significant descent to Lake Fedaia. |
| 6 | Rifugio Castiglioni Marmolada to Passo San Pellegrino | 21 km | +1,100 m / −1,200 m | One of the longest days, skirting the base of the Marmolada glacier. |
| 7 | Passo San Pellegrino to Rifugio Mulaz | 14 km | +1,150 m / −500 m | Demanding climb into the Pale di San Martino, often cited as one of the toughest ascents of the trek. |
| 8 | Rifugio Mulaz to Rifugio Rosetta | 8 km | +760 m / −750 m | Short in distance but technically challenging, crossing the Passo delle Farangole. |
Stages 9 to 13: The Remote South
The southern stages are more isolated, with fewer hikers as the route enters the wilder Belluno province.
| Stage | Route | Distance | Ascent / Descent | Notes |
| 9 | Rifugio Rosetta to Rifugio Treviso | 14 km | +720 m / −1,600 m | Punishing descent into the Canali Valley. |
| 10 | Rifugio Treviso to Passo Cereda | 8 km | +1,150 m / −900 m | Often described as a “rollercoaster” through forest and rock. |
| 11 | Passo Cereda to Rifugio Boz | 14 km | +1,200 m / −600 m | Crossing the Passo del Comedon into the remote Alpi Feltrine. |
| 12 | Rifugio Boz to Rifugio Dal Piaz | 15 km | +900 m / −650 m | Spectacular balcony walk across the Vette Feltrine. |
| 13 | Rifugio Dal Piaz to Feltre | 19 km | −1,670 m | Long, continuous descent marking the end of the route and a return to civilisation. |
Escape Routes, Rest Days and Flexibility
Do not plan the Alta Via 2 as if every stage is guaranteed to go exactly as expected. Weather, snow, fatigue, injury, or an uncomfortable level of exposure may force you to change plans. Several stages pass near roads, villages, cable cars, or valley exits, but these options are not always obvious once you are committed to a high route. Before each day, check the map, ask the rifugio staff about current conditions, and understand where you could safely descend if the route ahead becomes unsafe. If your schedule allows it, build in at least one spare day or avoid booking international travel too tightly after the trek. Flexibility is not a luxury on the AV2; it is part of good planning.
7. Navigation and Wayfinding
One of the great joys of trekking in Italy is the standard of wayfinding. You will not find the overgrown, indistinct tracks common in some Australian coastal parks.
Markers and Signage
The AV2 is marked by red-and-white paint splashes on rocks, trees, and poles. Look for the “Alta Via” triangle symbol with the number “2” inside. In the high alpine areas, where the track might be obscured by rockfall or snow, look for “ometti” (stone cairns). At every major junction, you will find a wooden signpost indicating the direction, the path number (e.g., path 601), and the estimated walking time to the next hut.
Navigational Tools
While the trail is well-marked, you must be self-reliant.
- Paper Maps: The Tabacco 1:25,000 maps are essential. They are incredibly detailed, showing every via ferrata cable and water trough.
- GPS: Always carry a digital version of the GPX track on a watch or phone. Fog can descend in minutes in the Dolomites, turning a clear plateau into a disorienting maze where paint marks are impossible to see.
8. Accommodation Options
On the AV2, your “tent” is the Rifugio. These are managed mountain hostels that range from rustic stone cabins to modern buildings with hotel-like amenities.
The Hut Experience
Staying in a rifugio is a cultural rite of passage.
- Dormitories: Most hikers sleep in “camerate” (dormitories) ranging from 4 to 20 beds. You are provided with a mattress, pillow, and heavy blankets.
- Mandatory Gear: You must use a “saccomenzuolo” (silk or cotton sleeping bag liner). Most huts will not allow you to sleep without one.
- Etiquette: Boots must be removed at the door and left in the “scarponi” room. Huts provide plastic clogs or “crocs” for indoor use.
Booking and Costs
The popularity of the Dolomites means that you cannot simply turn up and expect a bed. Huts often book out months in advance for the July and August peak, and some require a deposit at the time of booking.
For our trek, we paid deposits for several rifugi before leaving Australia, then paid the remaining balance each day by either credit card or cash. Prices varied significantly depending on the hut, room type, inclusions, and whether we had a dormitory bed or private room. For the two of us, half-board accommodation ranged from €99 to €293 per night as a couple. Around half of our nights were in dormitories, while the remainder were in private rooms. The private rooms were more expensive, but they made a noticeable difference to sleep quality, especially after long technical days, as we avoided the noise, movement, and snoring that can come with shared dormitories.
It is standard to book “mezza pensione” or half-board, which usually includes dinner, bed, and breakfast. Lunch, drinks, bottled water, tourist tax, showers, and packed lunches may cost extra, so do not assume your nightly rate covers everything you will need.
- Alpine Club Membership: Membership of an alpine club with recognised reciprocal hut rights may reduce the bed component of your stay in participating rifugi. For Australians, this may include membership through an eligible alpine club with UIAA reciprocal rights. Check the current rules before joining, as discounts vary by hut and usually apply to the accommodation portion rather than meals, drinks, showers, tourist tax, bottled water, or private-room supplements.
- Insurance benefits: Some alpine club memberships also include mountain rescue or travel-related insurance benefits, which can be valuable on a route like the Alta Via 2 where helicopter evacuation may be required after an accident. Do not assume all memberships provide the same cover. Check the current policy wording carefully, including rescue limits, medical cover, repatriation, exclusions, altitude limits, via ferrata coverage, residency requirements, and whether the policy is suitable for your entire trip.
9. Food, Water, and Resupply
Unlike trekking in the Australian outback, you do not need to carry 10 days of dehydrated meals.
Because of the warm and humid conditions we experienced, our water needs were higher than expected. We always started the day with sufficient water, but when reliable streams were available, we topped up and filtered water rather than relying only on hut purchases. A lightweight water filter was one of the most useful pieces of gear we carried. Do not assume that every mapped stream will be flowing, and do not leave a hut without knowing where your next realistic water source is likely to be.
Dining on the Trail
The food in the rifugi is a highlight. Expect high-calorie, alpine fare designed for hikers.
- Dinner: Typically three courses: a “primo” (pasta or polenta), a “secondo” (meat or cheese), and a “dolce” (dessert).
- Lunch: Most hikers buy a “panino” (sandwich) from the hut in the morning or stop at an intermediate hut for a bowl of barley soup.
The Water Challenge
The Dolomites are “thirsty” mountains. Because the rock is porous limestone, surface water is scarce.
- Karst Geology: Rainwater drains immediately into underground cave systems. This means there are very few streams on the high plateaus.
- Potability: Many huts have signs saying “acqua non potabile.” This is often for legal liability reasons, but it is safer to treat the water with a filter or purchase bottled water.
- Daily Carry: You should always start the day with at least 2 litres of water. There are sections, particularly on Day 5 and Day 8, where there is absolutely no water between huts.
Water costs can also add up. Some rifugi did not have potable tap water available, which meant either buying bottled water or treating water where it was appropriate to do so. We saw 1.5 litre bottles of water costing up to €8, which becomes expensive quickly when two people are drinking heavily in warm conditions. Carrying a lightweight water filter gave us more options for streams and untreated sources, but always follow hut advice. A filter is useful, but it does not make every non-potable water source safe in every circumstance.
10. Permits, Fees, and Regulations
Planning an overseas trek requires navigating local rules that are quite different from those in Australian National Parks.
Permits and Access
There is no “permit” required to walk the Alta Via 2. The mountains are open access. However, you will be paying for your accommodation and potentially for cable cars to access the trail.
- Cash is essential: Do not rely solely on credit cards. Some rifugi are explicitly cash-only, while others accept cards but may lose connection when their payment systems are offline. We carried €1,000 in cash for the trek so we could cover accommodation balances, meals, drinks, bottled water, tourist taxes, and other incidental costs if card payments were unavailable. You may not need that exact amount, but you should carry enough cash to pay for several nights, food, and water if electronic payments fail.
- Tourist Tax: Most huts will charge a small “tassa di soggiorno” (tourist tax) of a few Euros per night.
Regulations
- Wild Camping: This is the most misunderstood rule. In almost all Dolomite parks, wild camping is strictly forbidden. If you are caught with a tent, the fines are heavy. The rifugi system is designed to protect the fragile alpine environment from human waste and erosion.
- Rubbish: There are no bins in the mountains. You must pack out everything you bring in, including fruit peels and eggshells, which decompose very slowly at high altitudes.
11. Safety Considerations and Risks
The Alta Via 2 is a serious mountain undertaking. It is not a place for the unprepared. Rescue times can be long, weather can change quickly, and self-sufficiency is essential.
The Threat of Lightning
In the Dolomites, lightning is one of the major hazards to take seriously, especially on exposed ridges, high passes, open plateaus, and cable-protected sections. Via ferrata cables and other metal fixtures can become extremely dangerous during electrical storms, and mountain storms can build, clear, and redevelop faster than expected. Avoid exposed ground, summits, ridgelines, isolated poles or trees, and metal structures during a thunderstorm. If storms are forecast, start early, shorten the day, use an escape route, or stay put rather than committing to a high pass late in the day.
We had a frightening reminder of this near Rifugio Pradidali. Storms were forecast for the afternoon, and while we were sitting outside the rifugio, lightning struck a tall metal pole only about 10 metres from us. The thunder was immediate and intense. After the storm cleared, we continued up the valley towards our accommodation for the night, but as we approached the high pass the weather began to threaten again. Near the top, rain, hail and lightning closed in around us. The exposure only lasted a few minutes, but it was enough to make very clear how vulnerable you can feel in this terrain when electrical storms arrive.
The lesson is simple: take storm forecasts seriously. Being “nearly over the pass” is not the same as being safe. If there is a realistic chance of lightning, make conservative decisions before you are committed to exposed terrain.
Vertigo and Exposure
The exposure on the Alta Via 2 is real. Some sections look dramatic in photos because they are dramatic in person. There are places where the safest approach is to slow down, keep your eyes on the next few metres of track, maintain three points of contact where needed, and avoid looking too far down into the valleys below. This is not about bravado. It is about staying calm, moving deliberately, and recognising when the terrain requires your full attention.
If you are uncomfortable with heights, narrow ledges, steep drop-offs, or using your hands on rock, the AV2 may feel overwhelming. Some exposed sections are protected by cables, but a cable does not remove the need for good judgement, secure footing, and confidence in your own movement.
There are sections where the path is narrow, the drop is significant, and the visual exposure can be overwhelming. If you suffer from a debilitating fear of heights, the AV2 is unlikely to be the right trek for you unless you have already built confidence on similar terrain.
Rockfall
The Dolomites are crumbling mountains. Rocks can be dislodged by wind, melting snow, other hikers, or animals moving above you. Wearing a climbing helmet is highly recommended for technical sections such as Val Setus and Passo delle Farangole, and it is worth staying alert whenever you are moving through steep gullies, loose scree, or terrain beneath cliffs.
12. Fitness and Experience Required
How do you know if you are ready for the AV2?
Fitness
You need “mountain legs.” This is different from the fitness required for a flat marathon. You need the cardiovascular strength to keep climbing steadily for hours at a time, often with 800 to 1,500 metres of ascent in a day, followed by long, rough descents that place heavy load on your quads, knees and ankles. In Australia, the best training is doing repeated hill climbs with a weighted pack, ideally around 10–12kg.
Prior Experience
The AV2 should not be your first long-distance trek.
- Recommended Progression: If you have successfully completed the Overland Track in TAS or the Larapinta Trail in the NT, you have the endurance. However, the AV2 adds the element of technical rock movement.
- Via Ferrata Skills: You should be comfortable with basic scrambling (using your hands for balance). If you have never used via ferrata gear, it is worth taking a half-day course or practicing at a local climbing gym before you go.
13. How Does the Alta Via 2 Compare with Other Big Mountain Treks?
If you are considering the Alta Via 2, you may also be comparing it with other classic long-distance routes such as the Alta Via 1, Tour du Mont Blanc, the Walker’s Haute Route, or the Huayhuash Circuit in Peru.
We have not hiked the full Alta Via 1, so I cannot compare the two from personal experience. However, hikers we met who had completed both consistently described the Alta Via 2 as the more technical and demanding route. That matches the nature of the terrain we experienced. The AV2 includes steeper ground, more exposed traverses, more loose scree, and more frequent cable-assisted sections than many walkers may expect from a hut-to-hut trek.
The Tour du Mont Blanc is physically demanding, with significant daily ascent and descent, but it is generally less technical than the Alta Via 2. We hiked parts of the TMB region in 2024 while completing the Walker’s Haute Route, and my assessment is that the AV2 is a much more serious undertaking from a technical and exposure perspective. The elevation gain may be comparable across some of these routes, but the way the AV2 uses that elevation is different. The climbs can be steeper, the descents rougher, and the consequences of a slip more serious.
The Huayhuash Circuit in Peru is difficult in a different way. Julie and I completed an eight-day guided version in June 2025, and it remains one of the most physically and mentally demanding walks we have done. Huayhuash is higher, wilder and more remote, with sustained travel at altitudes that are far above anything on the Alta Via 2. Its challenge comes from altitude, isolation, camping logistics, cold nights, rough trails and the need to acclimatise properly.
The Alta Via 2, by comparison, is lower in altitude and supported by rifugi, but it is more technically confronting. The AV2 demands greater confidence with exposure, cable-assisted terrain, steep rocky traverses, loose scree, and sections where a slip could have serious consequences. Huayhuash felt more remote and austere; the AV2 felt more technical and exposed.
A useful way to think about it is this: the Tour du Mont Blanc is a demanding alpine walking route, the Alta Via 1 is generally considered a more accessible Dolomites high route, the Huayhuash Circuit is a remote high-altitude wilderness trek, and the Alta Via 2 is a step up in technicality, exposure, and sustained mountain judgement. None of these routes should be treated lightly, but the AV2 asks more of your footwork, confidence with heights, and ability to stay composed in exposed terrain.
14. Gear and Packing Considerations
Packing for the Dolomites is an exercise in weight management. You want to be light enough to climb efficiently, but prepared for cold, wind, rain, hail, or even snow at altitude.
Footwear
Do not attempt the AV2 in flimsy trail runners unless you are an elite mountain runner with exceptionally strong ankles. The rocks are sharp and the scree is unforgiving. A high-quality, mid-cut leather or synthetic boot with a stiff sole (Vibram is the standard) is essential for protecting your feet.
Technical Gear
- Via Ferrata Kit: A harness and a Y-shaped lanyard with shock absorbers and carabiners.
- Helmet: Essential for protection against falling rocks in gullies.
- Gloves: Inexpensive leather-palmed “riggers” gloves or specific via ferrata gloves are vital for handling the cold, rough steel cables.
Clothing Layers
- Base Layer: Moisture-wicking wool or synthetic.
- Insulation: A lightweight “puffer” jacket for the evenings (it gets cold at 2,700 m).
- Shell: A high-quality GORE-TEX or equivalent rain jacket. It must be 100% waterproof and windproof.
15. Guided vs Independent Hiking
Choosing how to tackle the AV2 depends on your comfort with risk.
Independent Hiking
For the experienced bushwalker, independent hiking is deeply rewarding. You choose your own pace and your own side-trips. You will need to handle all hut bookings and be confident in your navigation and via ferrata skills.
Guided Hiking
If you are nervous about the technical sections or the language barrier, a guided trek is a great option.
- Pros: Guides handle the heavy lifting of logistics and provide an extra layer of safety on the cables. They also know the “escape routes” if the weather turns bad.
- Cons: You are tied to the group’s pace, and it is significantly more expensive.
🥾 Explore nearby experiences →
16. Environmental and Cultural Respect
The Dolomites are not just a playground; they are a cultural landscape inhabited for millennia.
The Ladin People
In the northern sections of the AV2, you are walking through the Ladinia. The Ladin people have their own language and a unique culture centred around alpine farming and woodcarving. You will see “viles” (traditional farm clusters) and “stuben” (wood-panelled rooms) in the huts. A simple “Bungì” (Good morning in Ladin) will be met with great warmth.
The Great War
One of the most sobering aspects of the AV2 is the remnants of World War I. These mountains were the site of the “White War,” where Italian and Austro-Hungarian soldiers lived and died in tunnels and trenches at 3,000 metres. You will see old barbed wire and shell fragments. Treat these sites with the respect of a cemetery; they are a testament to human endurance in the most extreme conditions.
17. Is This Trek Right for You?
The Alta Via 2 is a transformative experience, but it demands respect.
This trek is for you if:
- You are a fit, experienced hiker looking for a “step up” in challenge.
- You enjoy the social atmosphere of mountain huts and Italian hospitality.
- You want to see some of the most dramatic mountain scenery on the planet.
This trek is not for you if:
- You prefer the solitude of a tent and cooking your own meals.
- You are a beginner hiker who is uncomfortable on steep, rocky ground.
- You are looking for a flat, easy-to-navigate holiday.
If the AV2 Looks Too Technical
If the Alta Via 2 appeals to you but the exposure looks intimidating, consider building up to it rather than making it your first Dolomites hut-to-hut trek. The Alta Via 1 is generally regarded as the more accessible and less technical of the two classic Dolomites high routes, and may be a better starting point for hikers who want the rifugio experience without committing to the same level of exposure and via ferrata-style terrain.
Another option is to spend time in the Dolomites doing shorter hut-to-hut routes or day walks from a fixed base, gradually adding steeper and more exposed trails as your confidence grows. If you have never used via ferrata equipment, take an introductory course or hire a qualified local guide for a day before attempting a long route where cable-protected sections form part of the journey.
The aim is not just to become fitter. It is to become more comfortable moving on steep rock, loose scree, narrow ledges, and exposed alpine terrain while carrying a pack.
Before committing to the Alta Via 2, be realistic about both your physical capacity and your comfort with exposure. This guide is designed to help experienced hikers assess the demands of the route and plan accordingly. For those with the necessary skills, preparation, and judgement, the AV2 offers a challenging and rewarding alpine traverse through one of Europe’s most complex mountain landscapes.
Photo Gallery
/Alta%20Via%202%20(8).jpg "Complete Guide to the Alta Via 2 (Italy)")
/Alta%20Via%202%20(26).jpg "Complete Guide to the Alta Via 2 (Italy)")
/Alta%20Via%202%20(11).jpg "Complete Guide to the Alta Via 2 (Italy)")
/Alta%20Via%202%20(23).jpg "Complete Guide to the Alta Via 2 (Italy)")
/Alta%20Via%202%20(17).jpg "Complete Guide to the Alta Via 2 (Italy)")
/Alta%20Via%202%20(1).jpg "Complete Guide to the Alta Via 2 (Italy)")
/Alta%20Via%202%20(27).jpg "Complete Guide to the Alta Via 2 (Italy)")
/Alta%20Via%202%20(4).jpg "Complete Guide to the Alta Via 2 (Italy)")
/Alta%20Via%202%20(16).jpg "Complete Guide to the Alta Via 2 (Italy)")
/Alta%20Via%202%20(14).jpg "Complete Guide to the Alta Via 2 (Italy)")
/Alta%20Via%202%20(7).jpg "Complete Guide to the Alta Via 2 (Italy)")
/Alta%20Via%202%20(28).jpg "Complete Guide to the Alta Via 2 (Italy)")
/Alta%20Via%202%20(10).jpg "Complete Guide to the Alta Via 2 (Italy)")
/Alta%20Via%202%20(12).jpg "Complete Guide to the Alta Via 2 (Italy)")
/Alta%20Via%202%20(19).jpg "Complete Guide to the Alta Via 2 (Italy)")
Do you have any photos from this hike?
Your photos can help others plan. Share shots from along the trail so fellow hikers know what to expect.
Plan carefully, hike safely: These guides are for inspiration and general planning only. Trails can change, conditions vary, and you are responsible for your own decisions, preparation, and safety. Use judgement, maps, and the Hiking Safety Systems to help you prepare effectively.
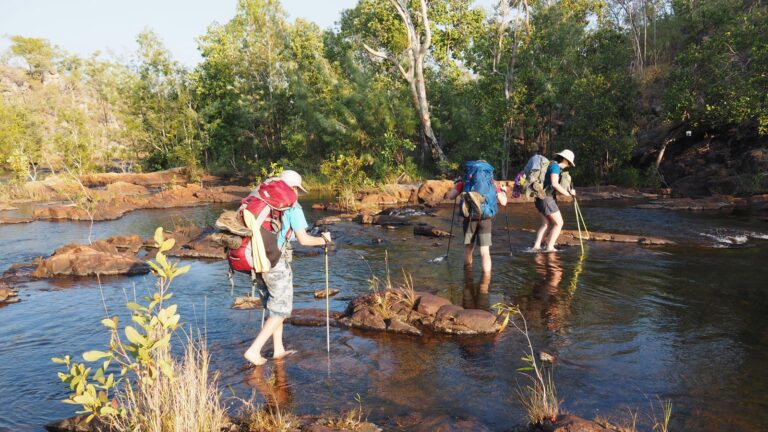
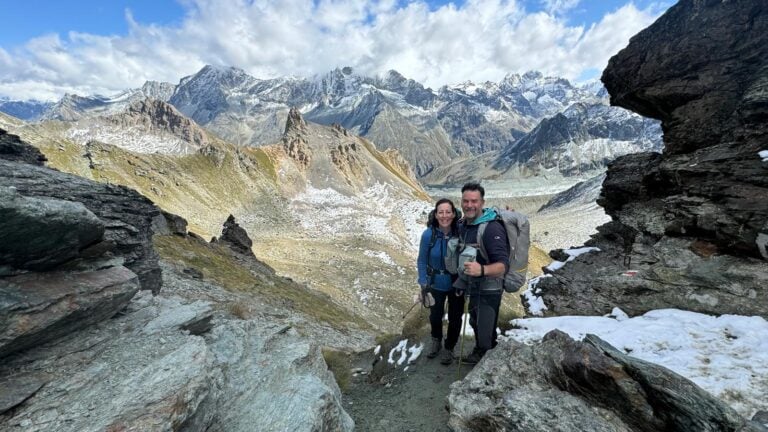
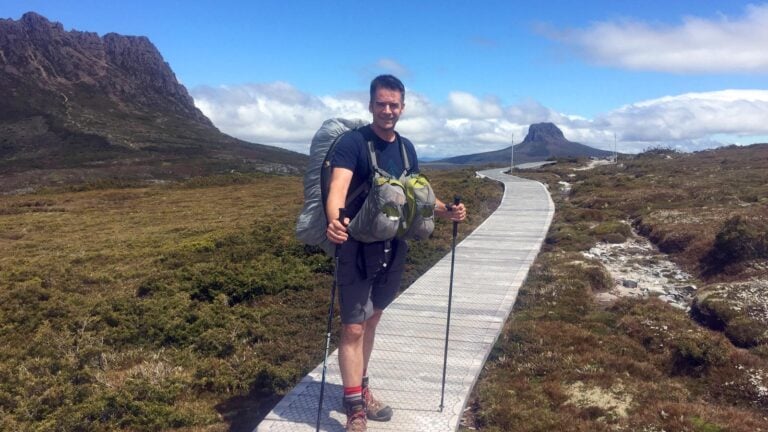



This was such an incredible adventure. Quite possibly the toughest trek Julie and I have done. It’s certainly not for everyone so if you are thinking of this one, do a lot of research.
Darren Edwards lots of exposure?
Kim Michelle Tonnet yep. Every day. There’s a bit of a gallery at the end of the guide.
Great review & write up, I’ve only just started my research but it sounds like my kind of adventure. I’ve done WAT & EAT in Tasmania over 14days, how does the exposure compare? Did you take your own via ferrata gear like harness & helmet or can you hire locally? Thks.
Alicia Crossley thank you. We did take our own via ferrata gear. When adding up the hire costs, it was cheaper to buy our own. Plus I have a bit of a thing with trusting my life with hiring. The pace and terrain is similar to WAT & EAT, and so is the exposure. But it felt like it was turned up a lot. We commented to each other often that it was like the Arthur range on steroids. For me, it made the Arthur’s feel tame, but my recollection of that challenge might be fading. It’d be interesting to do the Arthur’s again now to compare.
Thks for your reply comments, gives me abit to think about. Sounds exactly like my kind of trip but not what my potential walk companions would enjoy.
Alicia Crossley totally understand that. The first five days (from north to south) are nowhere near as technical or exposed. We met a lot of people who were just completing those five days before the terrain became a challenge. There is via Ferrata on those days but they are mostly side trips we did, but you can choose to avoid them.