Overview of the Western Arthur Range Traverse
The Western Arthur Range Traverse, located in Tasmania’s Southwest National Park, is an extraordinary adventure that defies simple description. The glacially sculpted range offers a unique and challenging experience that must be felt firsthand to be truly appreciated. This demanding trek requires a high level of preparedness and resilience, and those who undertake it are likely to remember their journey through the Western Arthur Range for a lifetime.
The Western Arthurs extends generally East-West from Mount Hesperus to West Portal. This section of the range was first traversed by Europeans in the early 1960s. This traverse, renowned for its rugged terrain and unpredictable weather, is a true test of endurance. Hikers are rewarded with stunning views of jagged peaks, pristine lakes, and lush valleys that define the Western Arthurs Range. The route also offers encounters with diverse flora and fauna, from towering eucalypts and delicate wildflowers to elusive marsupials.
The complete traverse is a circuit hike starting and ending at Scotts Peak Dam, typically taking 9-10 days. A shorter alternative, the Western Arthurs A-K (Alpha Moraine to Kappa Moraine), exits at Mount Scorpio via Kappa Moraine and usually takes 6-7 days. Hikers must be self-sufficient, carrying all food, water, and camping gear. Expect long, demanding days with significant elevation changes and rugged terrain, including thickets of scrub, boulder fields, and exposed ridgelines.
The track is steep and rough, with sections that can be perilous. The weather in Southwest National Park is notoriously volatile, with rapid shifts between extreme heat and heavy rain. As such, hikers must be ready for any conditions. Despite these obstacles, completing the traverse provides a profound sense of achievement and lasting memories.
The Western Arthur Traverse is suited to highly experienced walkers capable of handling remote, alpine environments. It is essential for participants to have strong navigation skills, be comfortable with rock scrambling, pack hauling, and coping with severe weather.
This iconic trek, part of the Tasmanian Wilderness World Heritage Area, has been a challenge for seasoned bushwalkers since the 1960s. It covers approximately 79 kilometres of rugged terrain, including steep slopes, alpine moorlands, and glacial lakes. The landscape is characterised by deformed Precambrian quartzite and quartz schist, with vegetation ranging from alpine heath and scrub to buttongrass and patches of rainforest on lower slopes.
Rated as a Grade 5 (Difficult) walk, the traverse’s challenging terrain can turn short distances into all-day endeavours. Newcomers should allocate ample time for the hike and be prepared to turn back if conditions become too severe. A Personal Locator Beacon (PLB) is essential for safety.
Disclaimer: While this guide aims to provide comprehensive information on the Western Arthur Range Traverse, it is not exhaustive and should be used as one of many resources in your planning process. Trail conditions, weather, and other factors can change, and I make no claims regarding the absolute accuracy of the details provided here. It is essential to consult multiple sources, including current trail reports, maps, and local expertise, to ensure that you are fully prepared for your hike.
WARNING: This hike is intended for highly skilled and physically capable walkers. It involves challenging navigation, steep cliffs, rock scrambling, pack hauling, and exposure to extreme weather. Only experienced bushwalkers with advanced navigation and emergency first aid skills should attempt this trek. The trails are rough, steep, and often unmarked. The difficulties of this walk should not be underestimated, and substantial experience in remote and alpine environments is required.
Trail Summary
Western Arthur Traverse (Full): The complete route spans approximately 79km. It starts at Huon Campground, traverses the ridgeline, and extends southeast past Mount Scorpio to the Western Portal, before descending into the Arthur Plains and returning to Huon Campground. This option usually takes 9-10 days.
- Trailhead: Huon Campground, Scotts Peak Dam
- Length: 79km (approximate)
- Duration: 9-10 days
- Accumulated Elevation Gain: Approximately 3,512m (excluding side trips)
- Highest Elevation: 1,098m (Mount Hesperus)
Western Arthur Traverse (A-K): Western Arthurs A-K (Alpha Moraine to Kappa Moraine): This popular shorter route covers 67km and takes 6-7 days. It involves climbing Alpha Moraine, crossing the ridgeline, and descending via Kappa Moraine.
- Trailhead: Huon Campground, Scotts Peak Dam
- Length: 67km
- Duration: 6-7 days
- Accumulated Elevation Gain: Approximately 2,618 m (excluding side trips)
- Highest Elevation: 1,098 m (Mount Hesperus)
General Information:
- Location: Southwest National Park, Tasmania, Australia
- Difficulty: Grade 5 (Difficult). Suitable for very experienced bushwalkers with specialised skills, including navigation and emergency first aid. Expect very rough, steep, and unmarked tracks.
- Style: Circuit
- Recommended Direction: Counterclockwise is preferred. This direction positions the prevailing winds at your back during the ascent, providing significant protection from the Roaring Forties’ strong winds, heavy rain, and challenging terrain.
- Duration: The time required to complete either traverse can vary significantly based on weather conditions, fitness, and experience. In the Arthurs, a typical pace is 1 to 1.5km per hour. It is advisable to allow an extra 2-3 days to account for potential adverse weather.
- Best Season to Walk: December to March. Snow, high winds, and heavy rain are possible at any time of year.
Facilities:
- Tent platforms
- Open drop toilets
- Hiker registration logbook at the car park
Permits and Registration:
- Registration is required for all participants, including those completing only part of the traverse. Register via Tasmania Parks and Wildlife Service.
- A valid national parks pass is required. This can be purchased in advance online.
Previous experience in this region is essential:
- If you have not undertaken challenging hikes in this region before, consider hiking to the summits of Mount Anne, Frenchmans Cap or the Mount Anne Circuit to experience the Southwest’s rugged environment and inclement weather before attempting the Western Arthur Range Traverse.
- For those not confident about completing the full traverse or the A-K section, an out-and-back hike to Lake Oberon offers a glimpse of the terrain, with increasing difficulty beyond this point. For more information, refer to the note at the end of Stage 3.
Recommended Itinerary for the Western Arthur Traverse
Whether you are tackling the full Western Arthurs Traverse or the shorter A-K option, start by following these notes up to Stage 6. After Stage 6, refer to the specific itineraries for the A-K option (the more popular route) or the full traverse.
The Western Arthurs Traverse includes a demanding 30km (18 mi) stretch along the range’s undulating crest, marked by frequent and steep ascents and descents. If you prefer hikes with long, flat sections and extensive distances, other options may be more suitable. Despite the challenging terrain, you’ll be rewarded with breathtaking views and a profound sense of achievement from navigating this rugged environment.
Note: The length and duration of each stage are approximate. In the Arthurs, a typical pace is 1 to 1.5km per hour.
STAGE 1
Huon Campground to Junction Creek
8.5km, 3-4 hours
The track to Junction Creek is clearly marked, featuring gentle hills and multiple creek crossings as it approaches the junction on Arthur Plains. During heavy rains, these creek crossings can become challenging and sometimes impassable, as there is no infrastructure in place to assist. Parts of the track can be extremely muddy, so it is important to walk through the mud to protect the surrounding vegetation. The campsite at Junction Creek is prone to flooding during heavy rain, but there are drier camping spots located to the south of the creek.
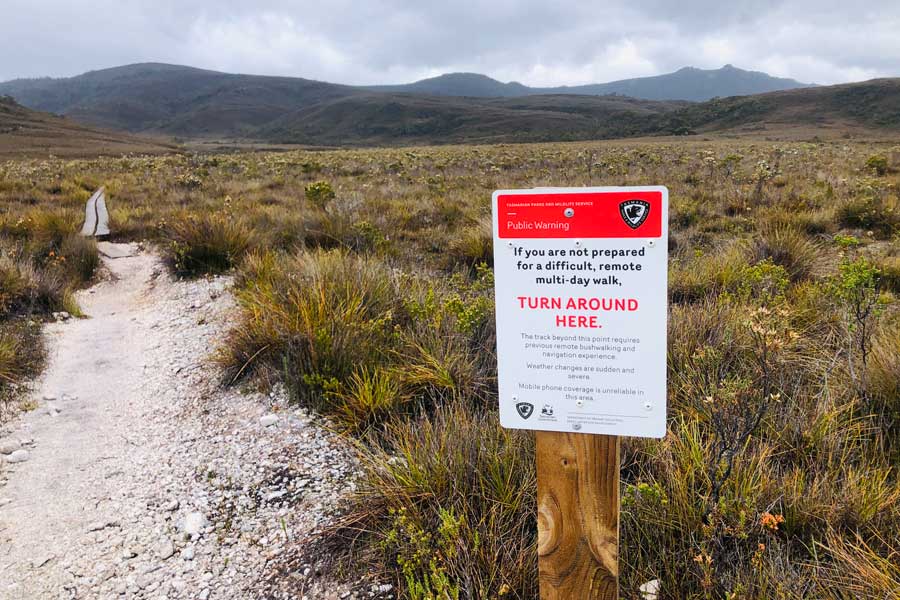
Before setting out, ensure all gear is properly checked. The trail begins with the walkers’ registration booth on the right, leading to the trailhead on the left. This trail is known as Port Davey Track, though some maps may refer to it as McKays Track.
Upon entering the treeline that borders the car park, the environment shifts to a shady forest dominated by myrtle beech, sassafras, and eucalypts. The forest floor is carpeted with light green moss, and a layer of brown leaf litter crunches underfoot as the path winds through the undulating terrain.
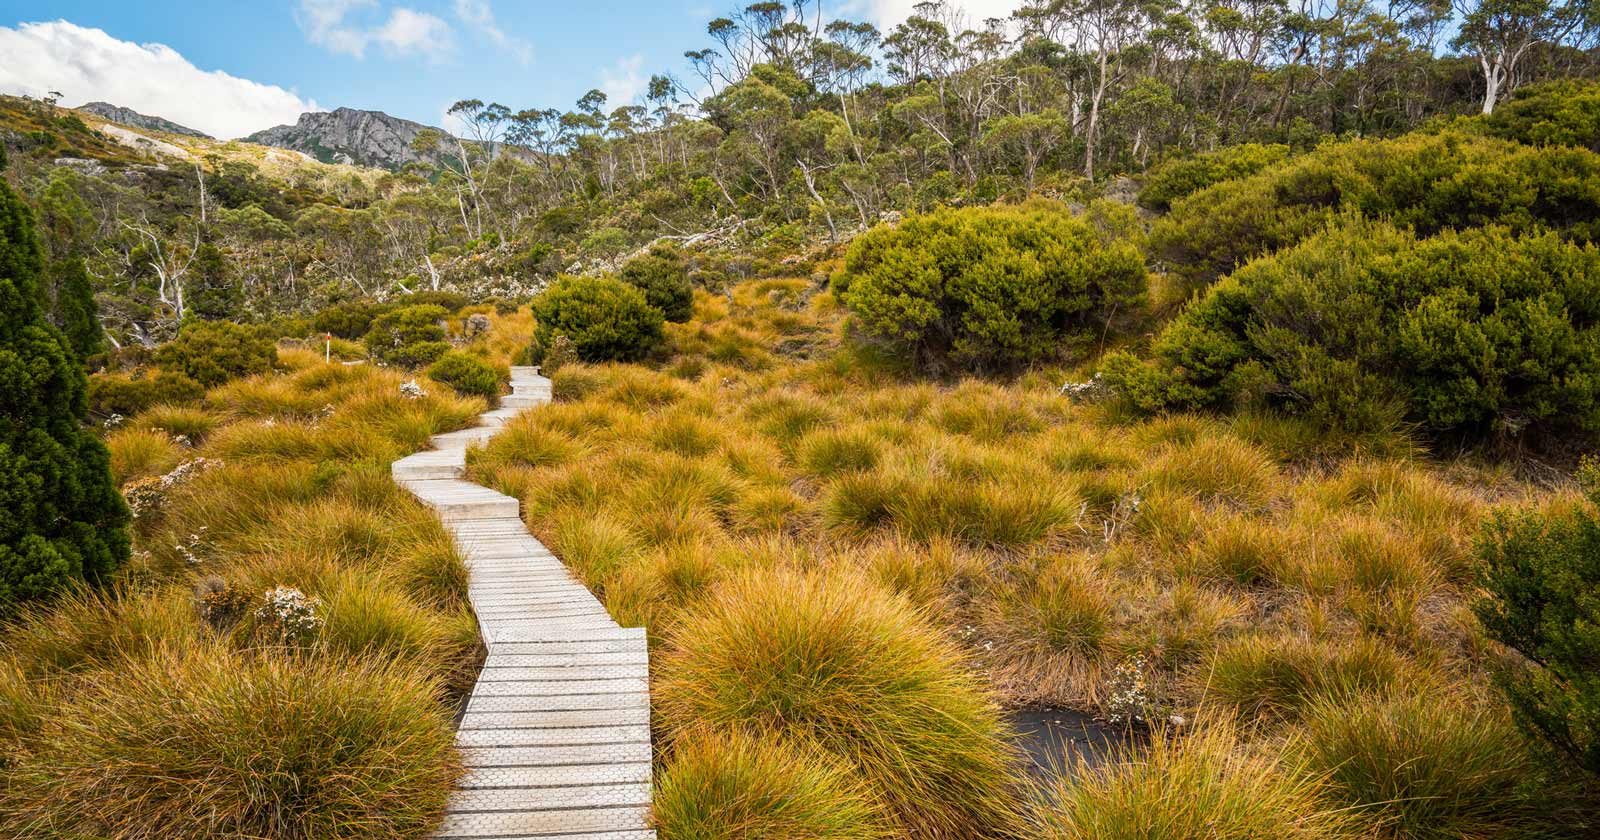
The track alternates between fringing forest and yellow buttongrass plains for the first kilometre, after which the vast moorlands begin. These moorlands, stretching towards the base of Mt Hesperus, are characterised by stunted red and yellow banksia, waratah, and pink swamp heath. From this vantage point, the razorblade ridgeline that lies ahead may appear daunting.
Shortly after the boardwalks end, the trail becomes increasingly muddy, a condition that persists throughout the boggy buttongrass plains. Despite the mud and the need to navigate small streams and deep pools, the rutted path eventually leads to Junction Creek, which is the first potential campsite located approximately 8.5 kilometres from the trailhead.
STAGE 2
Junction Creek to Lake Cygnus
9km, 6-7 hours
The second day’s journey from Junction Creek to Lake Cygnus begins at a track junction just beyond the Junction Creek campsite, where the route follows the Port Davey Track towards the Western Arthur Range. The trail initially traverses flat terrain but soon ascends steeply up Alpha Moraine, leading to the crest of the range. The track is well-marked, climbing significantly in elevation to reach an exposed ridge. After crossing a moor, the route passes below the summit of Mount Hesperus, requiring some boulder hopping and rock scrambling. Upon reaching the saddle between Mount Hesperus and The Capella Crags, the trail continues through the crags before descending steeply to Lake Cygnus, where a right turn at the junction during the descent leads to the campsite.
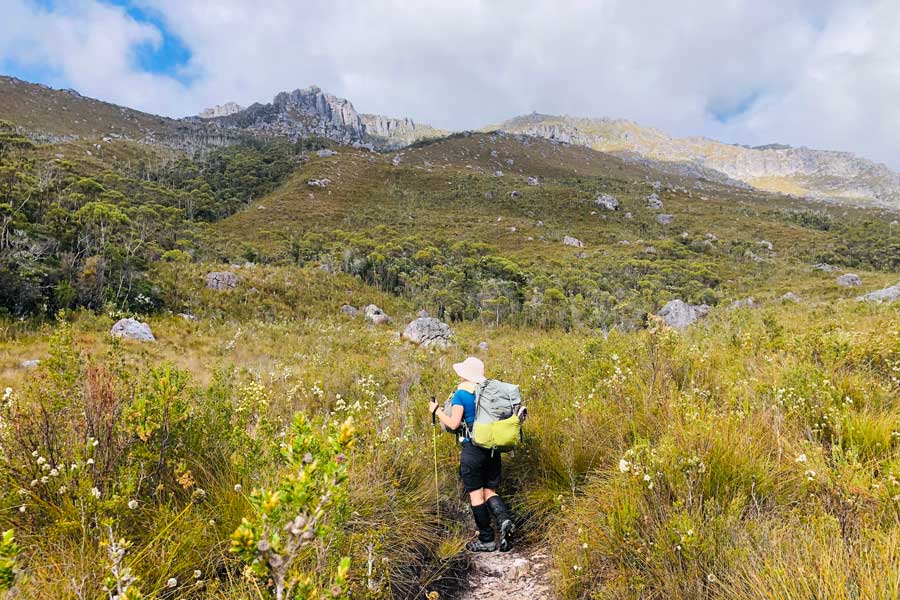
From the campground, its only a short walk to the first junction, where Port Davey Track intersects with McKays Track, which will be used on the return journey across Arthur Plains on the penultimate day. Continuing west (right) along Port Davey Track towards Alpha Moraine, the rugged Arthur Range becomes more prominent as the muddy trail winds southwest. The open plains offer views of the surrounding mountains, allowing you to trace the route that leads to the complex quartzite ridgeline.
After traversing the buttongrass moorland, the second junction is reached. Here, the trail to the right continues on Port Davey Track, while the Moraine A Track ahead ascends Alpha Moraine towards the northwestern shoulder of Mt Hesperus. At the base of Alpha Moraine, a small stream flanked by a sandy beach provides a final opportunity to refill water supplies. The beach also serves as an ideal makeshift campsite if time or energy is running low, though it lacks any toilet facilities.
Crossing the stream, the ascent of Alpha Moraine begins with a challenging climb. As you make your way over white granite shale and navigate deep muddy ruts, the northern landscape gradually unfolds behind you. The increasing elevation offers stunning views of Mount Anne rising against the sky, with Lake Pedder providing a breathtaking backdrop.
Eventually, the trail reaches the peak of the lateral moraine, marking the official start of the Western Arthurs Traverse. The dramatic landscape of the Arthur Range unfolds, revealing a formidable beauty that reinvigorates even the most tired adventurers.
As the traverse begins, stepping stones guide the way beneath the western face of Mt Hesperus, making the final climb more manageable. Moving deeper into the range, the scenery becomes increasingly spectacular, with patterned quartzite peaks emerging from yellow slopes adorned with purple irises and white alpine flowers.
The trail then descends into the saddle above Lake Fortuna (a potential side-trip), the first of many alpine lakes encountered on the traverse, before a final climb towards Capella Crag. Skirting around the eastern face of Capella Crag, the first view of Lake Cygnus appears, nestled in a deep glacial cirque. The descent to Lake Cygnus is steep but made easier by the presence of manmade stairs and tight switchbacks. The journey concludes beside the sparkling blue waters of Lake Cygnus on a coarse white beach.
In favourable weather, Lake Cygnus offers a refreshing swim to soothe sore muscles, although the water is notably cold. The campsite at Lake Cygnus is sheltered on three sides by a rugged ridgeline, providing protection from most weather conditions, with only a southerly wind posing a challenge. The campsite, located on the western banks of the lake, features two wooden tent platforms and an area covered with black mats that can accommodate additional tents. The beach itself offers extra space for tents if needed. Water can be sourced from the streams feeding into the lake or from the lake itself, provided a water filtration system is available. An open toilet is situated to the south of the tent platforms, tucked among the trees.
Possible side-trips:
- Lake Fortuna: 800 metres return, approximately 40 minutes.
STAGE 3
Lake Cygnus to Lake Oberon
5km, 5-6 hours
On Day 3, the route from Lake Cygnus to Lake Oberon begins with a climb back to the track junction before heading southeast. The rocky path follows the crest of the Western Arthur Range, which is highly exposed to the elements. After passing Mount Hayes, the trail involves several steep climbs in and out of rocky gullies, with sections requiring rock scrambling. A junction located below the Mount Orion saddle offers a right-hand turn leading down to the Lake Oberon campsite. The descent from the saddle is steep and rough, with additional rock scrambling necessary.
In the morning, clear skies may reveal a stunning display of soft yellow light gradually illuminating the slopes as preparations are made for the second day of the Western Arthurs Traverse. Water can be replenished from a creek below Square Lake, roughly halfway along the route, reducing the need to carry large amounts of water. Given the demanding nature of the latter part of the trail, running out of water, especially in hot conditions, would be highly undesirable.
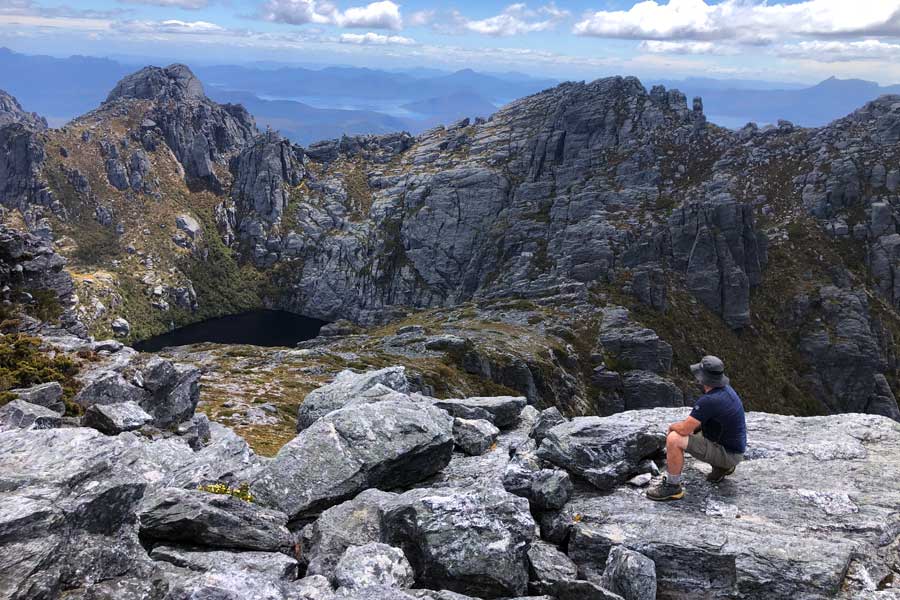
As the route departs from Lake Cygnus, it offers captivating views over Bathurst Harbour and the southern mountain ranges, partially framed by the deep blue lake. Soon after beginning the trek, the trail leaves Cygnus Cirque, following a well-maintained rock path beneath rocky spires towards Mount Hayes. Despite some exposure along the narrow trail beneath Mount Hayes, the path is straightforward until reaching the southern shoulder, where a steep descent begins. The breathtaking landscape, continuously unfolding, might overshadow any concerns about the trail itself.
Upon reaching the southern slopes of Mount Hayes, the track becomes more challenging. The trail unexpectedly turns left, descending steeply beneath disjointed cliffs into a shaded chute. The path winds beneath a slanted rock spire, leading onto a loose track that descends the eastern side of Mount Hayes. The unstable rocks require careful footing as the trail approaches another saddle. Despite its intimidating appearance, the descent to the saddle is manageable, offering impressive views back towards Mount Hayes, where the white shale track snakes through green vegetation and grey rocks. Ahead, the path leads onto a smaller summit south of Procyon Peak. The uneven track requires more attention here, inviting frequent pauses to fully appreciate the rugged landscape.
As the trail traverses the western face of Procyon Peak and descends gently towards Square Lake, a boggy section must be crossed before entering a small forest concealing a stream. This stream, flowing from the lake above, provides the day’s only fresh and consistent water source. After replenishing water supplies, nearby boulders beside the lake offer an ideal spot for a break or a refreshing swim, weather permitting.
Climbing out of the basin where Square Lake lies is a strenuous effort, particularly under a hot sun. The rough trail, littered with roots and rocks, ascends sharply, demanding perseverance. However, the continually evolving view behind, with sharp quartzite spires piercing the sky and steep green slopes dropping into deep blue alpine lakes, provides ample reward.
Cresting the saddle between Mount Orion and Mount Sirius offers the first view of Lake Oberon glistening below. The sight is breathtaking, with few other lakes matching its sheer magnificence. Before the challenging descent to Lake Oberon, there is an option to summit the two remaining peaks along the route, Mount Orion and Mount Sirius.
The final descent to Lake Oberon is indicative of what lies ahead on the Western Arthurs Traverse. The trail dips beneath a massive grey cliff, leading to a steep, rutted chute filled with broken boulders. Some exposed scrambling is required, and while some hikers may prefer to haul their packs, others may feel comfortable descending slowly with packs on.
After navigating this challenging section, the trail enters a wonderland of tall pandani, myrtle, and spiky scoparia. A well-maintained path of boardwalks and stepping stones guides the final approach to Lake Oberon.
The campsite at Lake Oberon is situated within a deep glacial cirque, where braided streams flow across the yellow valley toward the lake. The setting is otherworldly, with towering grey quartzite spires rising from dense slopes that plunge into the azure blue water. The water temperature in Lake Oberon is warmer than other lakes along the traverse, making it a perfect spot to relax and soothe tired muscles in the shallow waters near the pebbled beach.
The campsite features four tent platforms, each shaded by moss-covered myrtle and oversized scoparia trees. While two tents can fit on each platform, one platform is a tight squeeze due to a large boulder occupying much of the space. In addition to the tent platforms, a sandy cove next to the lake can accommodate two more tents if needed. An open toilet is located in the forest before the tent platforms, and water can reliably be sourced from the river, though filtration is recommended, with stream water being less reliable.
IMPORTANT NOTE: The sections immediately before and after Lake Oberon are particularly challenging and serve as a critical decision-making point. This area provides a glimpse of the difficult terrain that lies ahead. Beyond Lake Oberon, the trail becomes increasingly demanding, requiring a realistic assessment of your confidence and abilities. It’s important to be honest with yourself at this stage; turning back at this stage may be the safer choice for some. An out-and-back hike to Lake Oberon can offer a manageable yet challenging experience for those uncertain about completing the full traverse or the A-K section.
Possible side-trips: These potential side trips are often unmarked and traverse challenging terrain. Attempt them only if you have sufficient time and confidence in your abilities.
- Mount Hayes: 600 metres return, approximately 40 minutes.
- Mount Sirius: 800 metres return, approximately 30 minutes.
- Mount Orion: 800 metres return, approximately 45 minutes.
STAGE 4
Lake Oberon to High Moor
5km, 5-7 hours
The route from Lake Oberon to High Moor becomes increasingly challenging and hazardous. The terrain is rougher, steeper, and more exposed, as the track follows serrated ridges, high cliffs, and steep gullies. This section demands extensive climbing, scrambling, and pack-hauling. The trail is marked only by intermittent rock cairns, making strong navigation and map-reading skills essential. Water sources are scarce, particularly in summer and early autumn, so it is crucial to carry enough water to reach Haven Lake. This segment of the trail should be attempted only in favourable weather by experienced hikers.
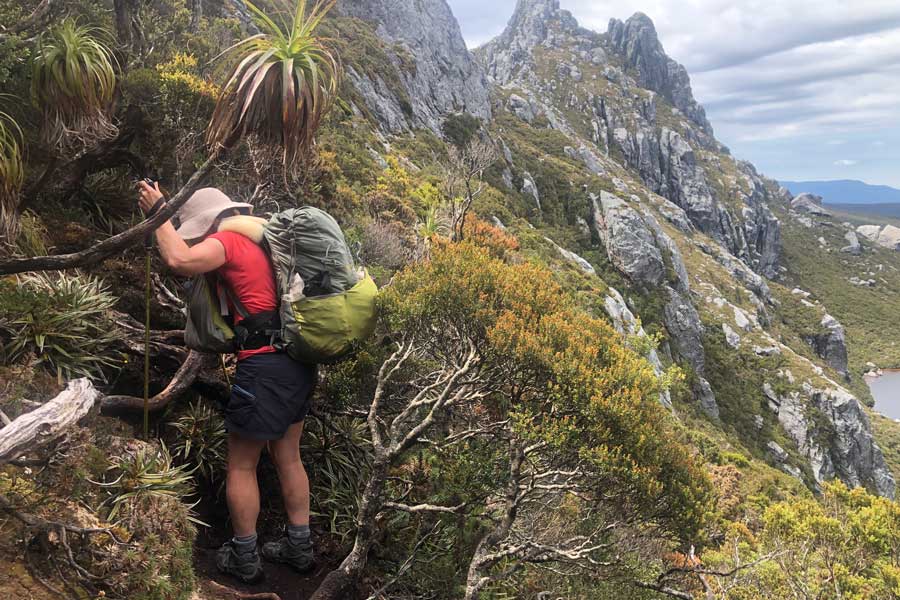
After leaving Lake Oberon, the path ascends toward Mount Pegasus, passing a small tarn before tackling a particularly treacherous section near the summit. This stretch may require pack-hauling in several areas. Shortly after the summit, the route descends into a steep gully and traverses beneath a buttress, a notably dangerous section where large boulders conceal deep gaps, posing a significant hazard.
Leaving the valley, the climb towards Mount Pegasus begins, signalling the start of a full day of technical challenges. The absence of reliable water sources between Lake Oberon and High Moor necessitates carrying a day’s supply from the outset. While occasional mountain run-offs and rock pools may appear after rain, they cannot be relied upon. Limited mobile reception is available atop Mount Sirius and nearby high points above Lake Oberon.
The ascent from Lake Oberon starts by veering southeast after a short distance, heading towards Mount Pegasus. Passing a small tarn and entering a saddle beneath the peak, the view reveals the lake on one side and the expansive Arthur Plains on the other. Exiting the saddle, the first technical ascent begins, guided by rock cairns leading up a boulder wall that requires basic climbing manoeuvres. Packs can be passed up to make the climb more manageable.
Once on level ground, the path winds through rocks and thick scrub before reaching a sheer cliff. Although the trail may appear to lead up the cliff, it is crucial to follow the cairn-marked path, which veers right around the cliff’s base. If confronted by a vertical drop, retrace steps to find the correct route around the boulders, as no part of the trail involves climbing an exposed vertical cliff face.
After overcoming this potential confusion, the track eases briefly, allowing time to absorb the striking landscape en route to the summit of Mount Pegasus. Just before reaching the peak, the path funnels into a cave formed by precarious boulders, requiring hikers to squeeze through a narrow opening. Pack-hauling is essential to navigate this section. Another rock tunnel appears shortly after, but it is not necessary to pass through it, as the trail veers right and descends the eastern face of Mount Pegasus.
The descent from Mount Pegasus involves navigating down white quartzite rock and through dense shrubs, using their thick branches for support. As the trail continues towards Mount Capricorn, Lake Uranus dominates the view, backed by the sharp peak of Mount Capricorn. While a few misleading paths might emerge, following the cairns ensures staying on track. The saddle before the final summit scramble provides a brief respite, ideal for a break before tackling Mount Capricorn.
A scramble over grey boulders leads to the summit of Mount Capricorn, offering a vantage point to look back at the precarious trail traversing the ridgeline. The descent from Mount Capricorn tests one’s tolerance for heights, as it involves scaling a steep, shrub-covered cliff. Clinging to overhanging branches, hikers carefully descend over boulders and dirt steps along the eastern spine of the mountain.
Reaching the flat ground in the saddle below brings a sense of accomplishment, with the trail cut into the steep mountainside partially hidden from view. The final stretch to High Moor passes quickly, as the trail becomes more manageable, though there is still a climb before reaching the boardwalks that lead to the High Moor campsite.
The High Moor campsite is located just beneath Mount Columba in a somewhat sheltered area, offering sweeping views over the Arthur Range. While there is no lake nearby, the panoramic views do not disappoint. A short walk back to the saddle above High Moor and a summit of Mount Columba at sunset provides a spectacular end to the day, with the sun casting a golden glow over the Arthur Range as it dips into the southern ocean.
The campsite features an open toilet and a small stream next to the tent platforms for water. Two tent platforms are connected by boardwalks to protect the surrounding vegetation. Up to nine tents can fit on the platforms, but it can get quite cosy, so earplugs are advisable for a good night’s rest.
Possible side-trips: These potential side trips are often unmarked and traverse challenging terrain. Attempt them only if you have sufficient time and confidence in your abilities.
- Dorado Peak: 1.2 kilometres return, approximately 2 hours.
- Mount Columba: 500 metres return, approximately 15 minutes.
STAGE 5
High Moor to Haven Lake
5km, 6-7 hours
After leaving High Moor, the trail leads to the Beggary Bumps, a series of steep ascents and descents that mark the most challenging section of the Western Arthurs Range Traverse. Among these, the Tilted Chasm stands out as particularly daunting, often leaving hikers questioning if they are still on track. This part of the trail demands careful navigation, and some sections may require pack-hauling.
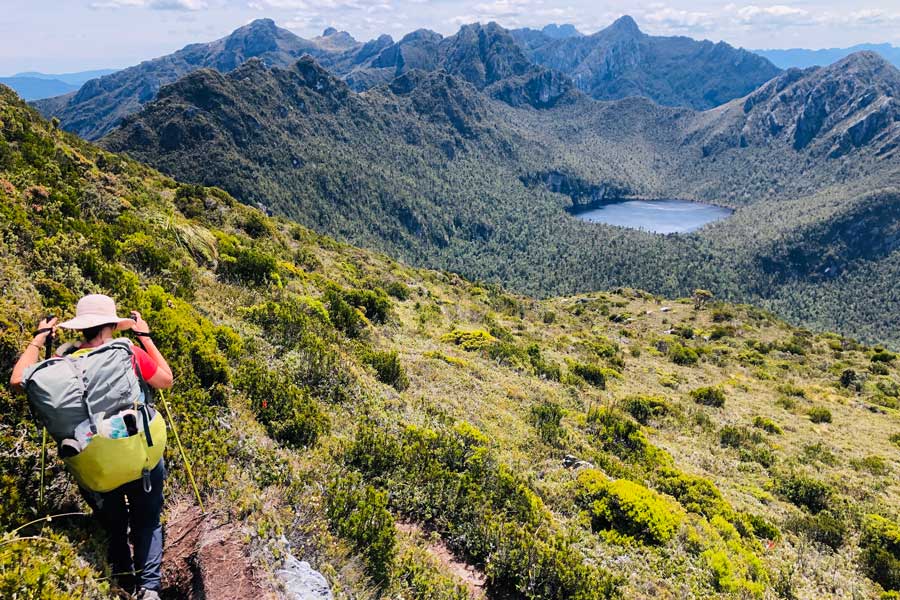
For those who enjoy sunrises, High Moor offers a remarkable vantage point to watch the sun rise over the Eastern Arthur Range, with Federation Peak silhouetted against the morning sky. However, it is important to note that there are no reliable water sources between High Moor and Haven Lake, necessitating the carrying of sufficient water for the day’s hike.
The day begins with a climb onto the Beggary Bumps, a series of jagged peaks with steep slopes and damp chasms. The initial trail is straightforward but quickly transitions into a steep descent through a shaded chute. The path, made of white shale and eroding rock, is lined with woolly tea trees and pandani, which provide handholds as hikers navigate the drop. Emerging from the chasm, the trail traverses the southern mountainside above Lake Ganymede, with horizontal trees crossing the path to assist with the steep slope.
After climbing through a section of gnarled trees, the trail reaches the Tilted Chasm. This notorious section requires a descent between two slanted slabs of damp granite. Moss clings to the chasm’s walls, making some rocks slippery, and careful navigation is essential. While some hikers may prefer to haul their packs at the start and end of this section, it is possible to descend with packs on, using handholds on the coarse rock.
Once past the Tilted Chasm, the trail continues towards The Dragon, where a slightly muddy path leads to a fun scramble near the summit. Just before reaching the peak, the trail turns east and drops over the southern shoulder, leading to another steep descent through gnarled trees and boulders. This section requires careful manoeuvring, but the surrounding trees provide support and protection from the precipitous slope.
After completing this descent, the trail leads to a saddle beneath The Dragon, offering a view back at the jagged Beggary Bumps. The quartzite peaks and hanging valleys appear almost impassable from this vantage point, highlighting the difficulty of the previous section. However, the technical challenges are not over, as the trail continues along the ridgeline towards Mount Taurus, with more exposed boulders and rutted slopes to navigate.
Before reaching Mount Taurus, the trail passes a final unnamed peak, offering a view of two lakes on either side of the Beggary Bumps. This is a good spot for a break, with a shaded overhang just past the peak providing respite from the sun. The final descent before Mount Taurus includes an awkward boulder drop, best navigated by using tree limbs for support as you shimmy down between the rocks.
The climb onto Mount Taurus provides an opportunity to summit the final peak before reaching Haven Lake. After descending the eastern shoulder of Mount Taurus, the trail emerges onto a flat boulder, revealing the first glimpse of Haven Lake nestled between two grey peaks.
A final tricky manoeuvre is required to descend between another set of steep boulders before finishing the trek on a shrub-filled slope. The shores of Haven Lake are a welcome sight after a long day, and a refreshing dip in the lake is an ideal way to unwind.
The Haven Lake campsite offers a protected oasis within the rugged mountain range. The campsite includes four platforms, each accommodating two tents, and an open drop toilet hidden in the surrounding shrub. Water can be sourced from the lake, but it is advisable to use a filtration system, as with other non-flowing sources like Lake Oberon and Lake Cygnus.
Possible side-trips: These potential side trips are often unmarked and traverse challenging terrain. Attempt them only if you have sufficient time and confidence in your abilities.
- Mount Columba: 500 metres return, approximately 15 minutes. (Stage 4 or 5 between Lake Oberon and High Moor)
- Mount Aldebaran: 2.2 kilometres return, approximately 2-3 hours. (Stage 5 or 6 between High Moor and Haven Lake)
Final stages of the A-K Traverse
STAGE 6 (A-K)
Haven Lake to Junction Creek
20km, 8-10 hours
After leaving Haven Lake, the trail remains rough, steep, and exposed until reaching Lake Sirona. Beyond Lake Sirona, the ridgeline broadens, offering a less strenuous but still exposed walk before the ascent of Mount Scorpio. The day culminates in a long descent down Kappa Moraine to Arthur Plains, where walkers should be prepared for muddy conditions, multiple creek crossings, and weather-sodden buttongrass.
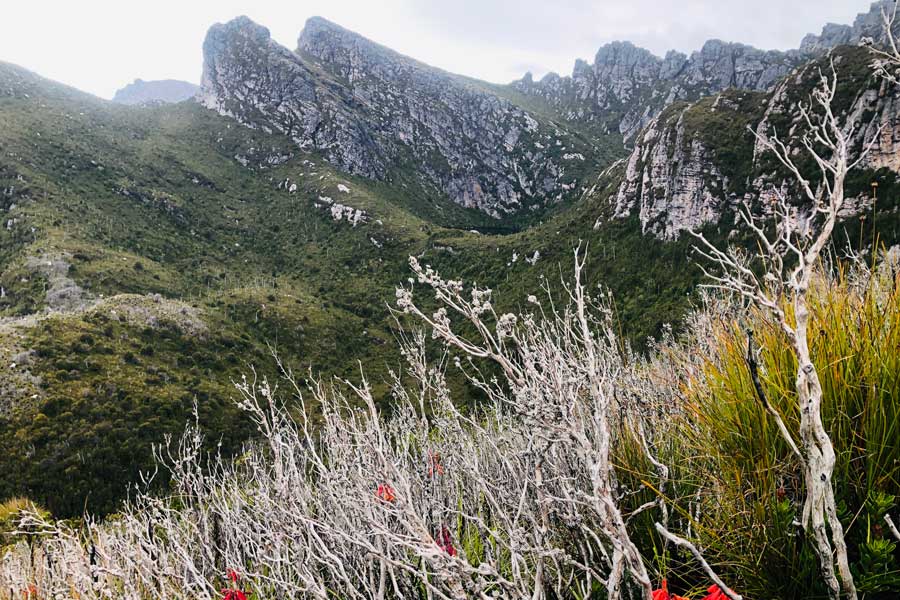
The route from Haven Lake begins with a climb out of the glacial cirque, offering evolving views of the towering peaks traversed the previous day. A combination of steps and grippy rock aids the ascent to the eastern saddle, overlooking the remaining Arthur Range. The technical hiking continues beyond the saddle, with the trail clinging to the edge of a precarious slope, leading through gnarled trees and over white marble boulders as it ascends the ridgeline toward Lake Sirona.
On the far side of a small peak, the trail descends over loose shale into a sloping meadow dotted with boulders and yellow alpine shrubs. The golden slopes and plunging peaks, set against azure blue lakes, create a breathtaking scene, with views extending to the southeast over the Eastern Arthurs and the final peaks of the Western Arthurs Traverse. The path then turns north, leading to a collection of boulders forming a peak above Lake Sirona. A steep, exposed descent over broken boulders follows, bringing walkers closer to Lake Sirona. The final technical challenge involves shimmying between two boulders before dropping onto a slanted rock below, where removing packs can make the descent easier.
Lake Sirona is nestled in a saddle, fed by braided streams from Mount Scorpio. After replenishing water supplies, the trail crosses the southeastern banks of the lake and begins a gradual ascent toward Mount Scorpio’s summit. The climb is relatively gentle, passing through vast golden meadows and leading to the bare rocky peak. The final stretch involves a brief exposed slab climb, which is less daunting than it appears, allowing access to the summit of Mount Scorpio, the last Abel of the shortened Western Arthurs Traverse.
From Mount Scorpio, the trail begins a gruelling descent down Kappa Moraine to Arthur Plains. The initial descent is steep, with significant elevation loss in a short distance, though less technically demanding than previous sections. As the trail continues downward, Lake Vesta, Lake Juno, and Promontory Lake become visible below Carina Peak, providing a stunning backdrop and a welcome distraction from the strain on tired joints. The trail eventually levels out slightly before reaching a track junction and a walkers’ registration station.
Continuing northeast down Kappa Moraine, the trail eventually reaches Arthur Plains, where the terrain flattens and the walking becomes easier, though often muddied, especially after rain. Rusted stakes guide the way across the buttongrass plains, leading to the thick dry scrub bordering Seven Mile Creek.
The approach to Seven Mile Creek can be challenging, with the trail difficult to follow, particularly in overgrown vegetation or at night. Crossing the shallow creek is best done with shoes and socks removed to avoid blisters. A small clearing near the creek can serve as an undesignated campsite, though there are no toilets, so it is essential to practice proper waste disposal by staying at least 100 metres away from the water source.
From Seven Mile Creek, the trail follows orange arrows away from the creek bed and begins a long traverse northwest across the barren Arthur Plains. While this section may seem bleak, the sight of the majestic Western Arthur Range to the southwest provides some solace. The moorlands are prone to boggy conditions, particularly in depressions and near streams, making gaiters and long pants advisable to keep feet dry.
A shaded section along the undulating traverse conceals Wullyawa Creek, where a small clearing offers space for a few tents if needed. Crossing the creek is aided by logs, and a brief stretch through a forest carpeted in moss provides a welcome break from the open moorlands. However, the trail soon returns to the open plains, with the next band of trees serving as a marker of progress.
Finally, the trail reaches Junction Creek, where the campsite provides a much-needed rest spot. The campsite is set in a dry eucalypt forest, with multiple open spaces for pitching tents and an open drop toilet among the trees. Though not the most picturesque of the designated campsites, it offers shelter for weary hikers. Care should be taken when selecting a tent site, as fallen trees and extended limbs can pose hazards, especially in high winds.
Possible side-trips: These potential side trips are often unmarked and traverse challenging terrain. Attempt them only if you have sufficient time and confidence in your abilities.
- Mount Aldebaran: 2.2 kilometres return, approximately 2-3 hours.
- Mount Scorpio: 100 metres return, approximately 15 minutes.
STAGE 7 (A-K)
Junction Creek to Huon Campground
8.5km, 3 – 4 hours
After a well-deserved night’s rest at Junction Creek, the final leg of the Western Arthurs Traverse involves retracing the path back to Scotts Peak and the welcome relief of a hot shower. The return journey, though familiar, feels different as the trail gradually descends from the rugged heights of the range.
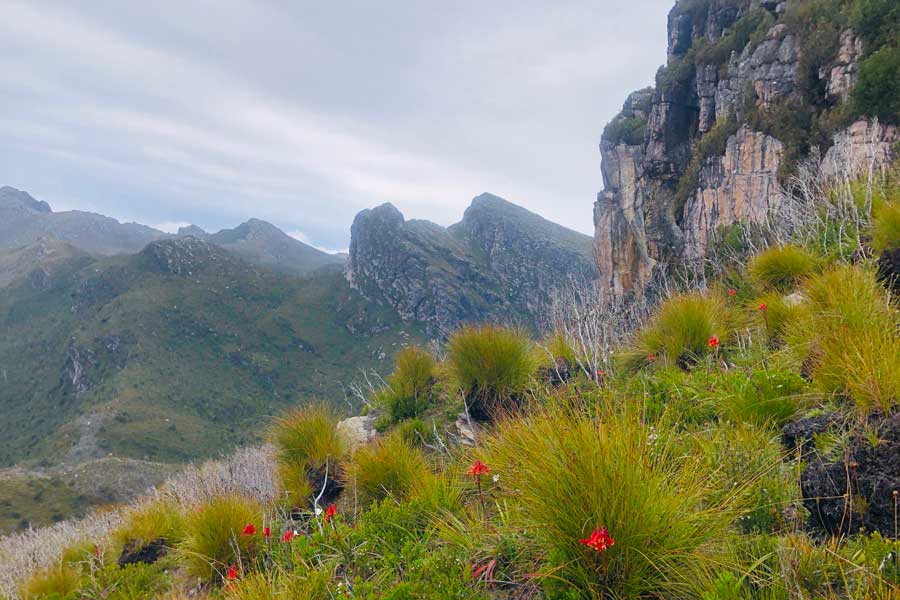
As you make your way through the myrtle forest, the path becomes easier to navigate, and the kilometres pass more quickly than they did on the first day. The anticipation of reaching the end adds a new energy to each step, with the dense forest offering occasional glimpses of the journey’s end.
The sight of the boot-cleaning station at the edge of the myrtle forest marks the final steps of this challenging traverse, leaving a lasting impression of both the rugged beauty and the personal achievement of completing one of Tasmania’s most demanding hikes.
Final stages for the Full Traverse
STAGE 6 (Full Traverse)
Haven Lake to Promontory Lake
5km, 5 hours
From Haven Lake, the trail begins with a gentle climb to the saddle to the west, followed by a traverse across the eastern face of a rocky knoll. After descending the knoll’s northern side, an easy, open walk leads to the next knoll, which can be climbed without difficulty. The descent from the northern side of this second knoll is steeper in places, leading down to the exposed Lake Sirona.
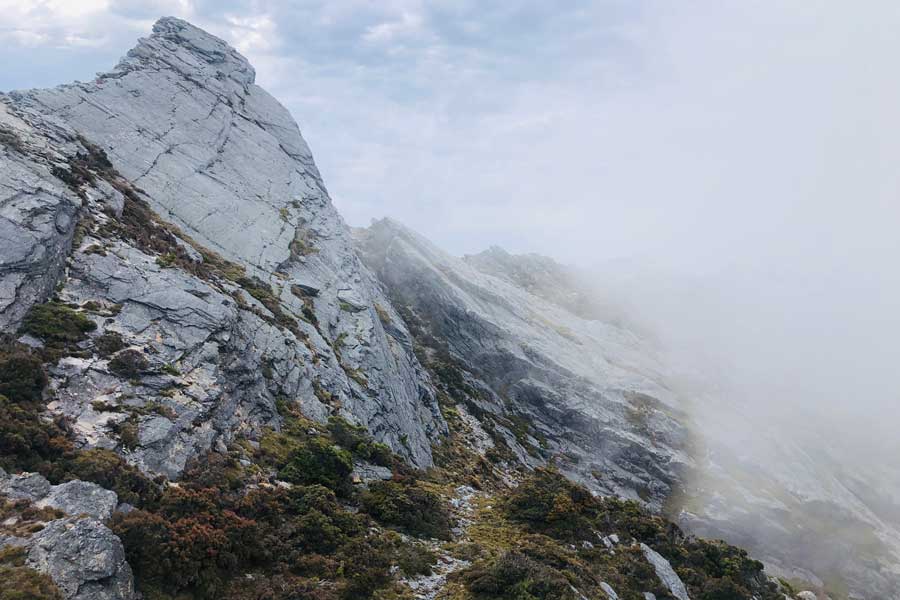
From Lake Sirona, the route across the moorland to Mount Scorpio (1,108 metres) is straightforward. An optional ascent involves a 10-metre scramble along a narrow ridge to reach the summit. The path then continues north, offering extensive views to both the east and west, towards what appears to be the edge of an escarpment, with Kappa Moraine descending to the plains below.
The trail descends this escarpment for about half an hour to the top of the moraine, where it forks. One route heads northeast down the moraine, while another leads south towards the scarcely visible Lake Vesta. Unless exiting the track here, take the southern route, which follows a stream valley down to Lake Vesta and then descends steeply to Lake Juno. From Lake Juno, it is a short 100-metre climb to Promontory Lake. Following the northern and eastern shores will lead to campsites in the southeastern corner of the lake.
Possible side-trips: These potential side trips are often unmarked and traverse challenging terrain. Attempt them only if you have sufficient time and confidence in your abilities.
- Mount Scorpio: 100 metres return, approximately 15 minutes.
- Carina Peak: 1.4 kilometres return, approximately 1 hour.
STAGE 7 (Full Traverse)
Promontory Lake to Lake Rosanne
11km, 9 hours
Head southeast from the lake, following a faint path through thinning vegetation, ascending past the rocky knoll of The Sculpture. Continue upwards over the boulder-strewn mountain of The Phoenix, which stands at 1,091 metres. Beyond The Phoenix, the Crags of Andromeda await, separated by a valley.
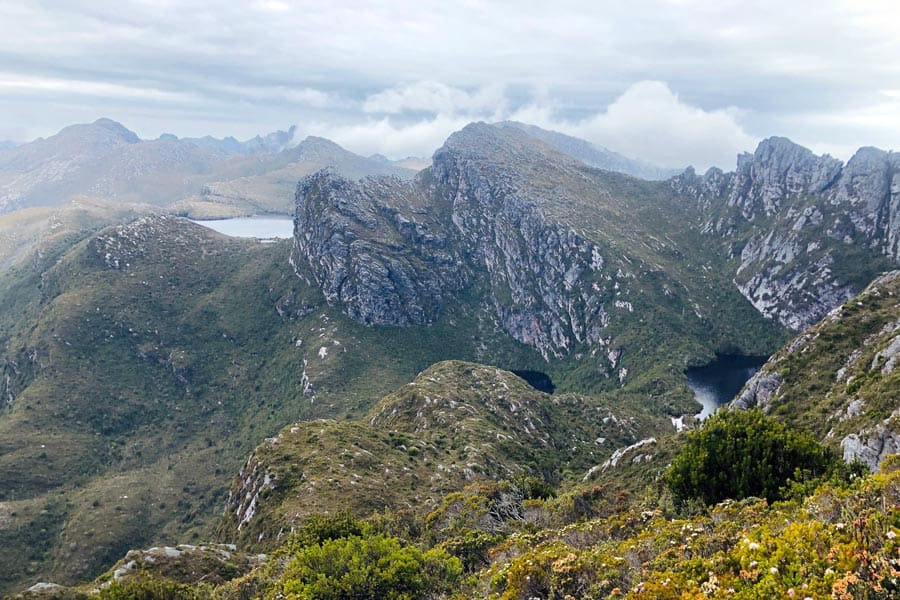
To reach the Crags, descend to a broad saddle and traverse the undulating Centaurus Ridge, which extends for about 3 kilometres. At the ridge’s end, the slopes leading to West Portal begin. West Portal, at 1,191 metres, is the highest peak in the Western Arthurs. Ascend its western ridge to the 1,100-metre contour, where it is advisable to leave your pack. From here, scramble to the summit via the south side of its twin peaks, where sweeping views encompass the ground covered over the past five days and the Eastern Arthurs. If this ascent is skipped, deduct an hour from the time estimate.
After returning to your pack, follow the faint path north along the stony slopes of the Crags of Andromeda, staying close to the crest or just west of it for about an hour. At the northern end of the Crags, descend eastward into a valley, then navigate a challenging path through thick scrub, contouring to avoid the densest sections. As the scrub gives way to grass, Lake Rosanne, at 633 metres, comes into view below, offering a suitable campsite.
Possible side-trips: These potential side trips are often unmarked and traverse challenging terrain. Attempt them only if you have sufficient time and confidence in your abilities.
- Mount Canopus: 3.2 kilometres return, approximately 3 hours (Stage 7 between Promontory Lake and Lake Rosanne)
- Lake Venus: 600 metres return, approximately 15 minutes (Stage 7 between Promontory Lake and Lake Rosanne)
- West Portal: 800 metres return, approximately 45 minutes (Stage 7 between Promontory Lake and Lake Rosanne)
STAGE 8 (Full Traverse)
Lake Rosanne to Seven Mile Creek
14km, 6 hours
Skirt around the ridge south of Lake Rosanne, push through scrub at the outlet, and begin the long 400-metre descent down the moraine. This descent leads out of the mountains and onto the flat Strike Creek Plains. Cross these wet button grass plains in a northeast direction for a few kilometres, heading towards the low Razorback Ridge. Ascend through the ridge for a couple of kilometres to reach the junction with the Huon and McKay Tracks, located just west of Cracroft Crossing.
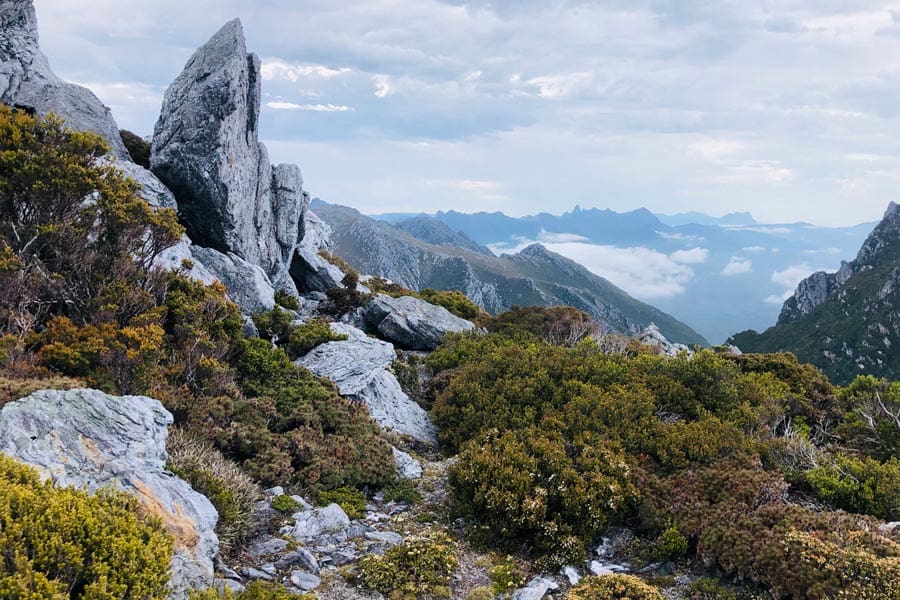
Follow McKay’s Track northwest as it circles around the northern side of the Razorback Ridge, then veers west to climb back up to the low crest. This section provides excellent views of the Western Arthurs. By following this route, the track avoids dense vegetation and remains on drier areas of the hillside. It then descends the southern side of the Razorbacks onto the Arthur Plains, a vast, flat area situated to the north of the Western Arthurs.
Proceed northwest across the muddy button grass plains for 5 kilometres, passing to the north of a wooded knoll. After traversing these wet plains, you will reach Seven Mile Creek, where the descent down Kappa Moraine meets McKay’s Track. This area offers good, sheltered campsites.
STAGE 9 (Full Traverse)
Seven Mile Creek to Scotts Peak Dam
16.5km, 8 hours
From Seven Mile Creek, the path continues west across the Arthur Plains, generally following the slightly higher ground. The trail predominantly traverses gravel-covered button grass, although it occasionally dips into shallow valleys formed by small creeks, where the vegetation is dense and the terrain often muddy. Throughout this section, the rugged quartzite peaks of the Western Arthurs, traversed earlier in the journey, remain visible to the south.
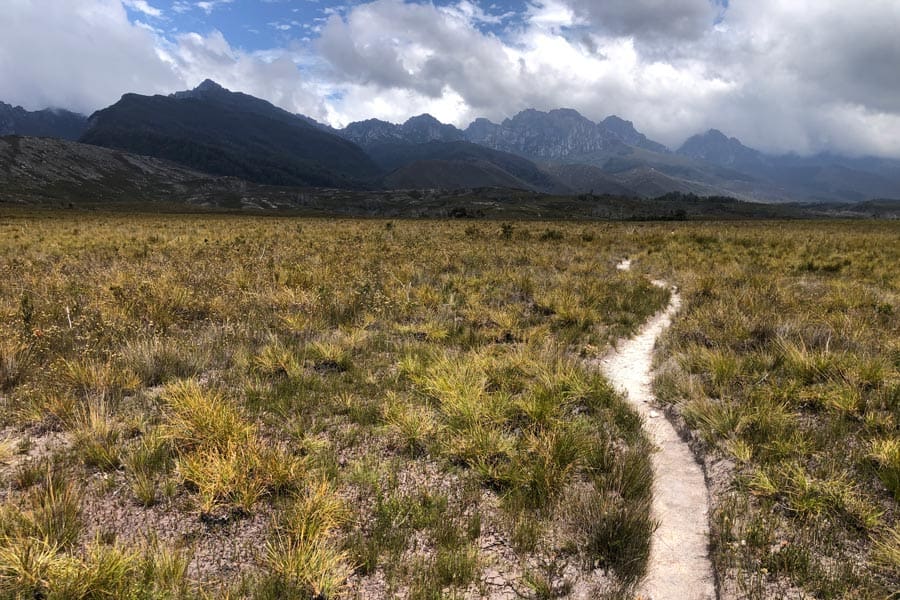
After approximately four hours on McKay’s Track, the junction with the Port Davey Track is reached, marking a return to familiar territory. Turning right, the route retraces the path taken eight days earlier, leading to a quick descent to Junction Creek. After crossing the creek, the journey continues north along the Port Davey Track for just under four hours to reach the carpark at the Huon River Campsite.
The initial part of this section on the Port Davey Track is frequently muddy, but it transitions to well-drained, boarded areas after a couple of hours, followed by a brief passage through primeval forest. Given the length of the final day, camping at Junction Creek and completing the remaining 8.5 kilometres to the trailhead the following day is a viable option.
Maps and General Information
- TASMap 1:50,000 Western Arthur map
- TASMap 1:50,000 Hartz map
- TASMap 1:50,000 Adamsons map
- John Chapman’s South West Tasmania: This comprehensive guide, now in its 6th edition (2017), provides detailed maps and trekking notes, serving as a valuable resource for planning and executing your journey.
- Western & Eastern Arthurs Traverses Facebook Group: Stay informed about current hiking conditions in the range by joining this active online community, which offers up-to-date information and insights from fellow trekkers.
For route maps and downloadable GPX files, check out the Full Traverse and A-K Traverse hikes on this website.
Registration and Permits
Walkers are required to register for this hike and complete the logbook at the trailhead. Registration is open up to 12 months in advance and is free of charge. Daily departures are limited to 12 people, with a recommended group size of six. Registration is necessary only for the day of departure. Should plans change, cancelling the registration is essential to allow others to book. Instructions for cancellation are included in the confirmation email. For registration, visit Tasmania Parks and Wildlife Service.
A valid national parks pass is required for entry. These passes can be purchased online in advance at Parks Passes.
Important Note: Unfortunately, it has become increasingly common for hikers to arrive at camp only to find their reserved tent platform occupied by others who did not respect the booking system. This can lead to a frustrating experience after a long and challenging day on the trail. The tent platforms are installed to protect the environment and ensure everyone has a safe and enjoyable experience. When hikers do not adhere to the reservation system, it not only affects those who have followed the rules but also undermines efforts to maintain the natural beauty and sustainability of the area. By booking in advance and respecting the reservation system, you help ensure that your camping spot is available and contribute to a more organised and environmentally responsible hiking experience for everyone.
Getting There
Reaching the start of the Western Arthur Range involves travelling to the Huon Campground, located 81 kilometres west of Mount Field via Scotts Peak Road and Maydena. Note that fuel is not available beyond Maydena, and phone reception is intermittent. Public transport is not provided along Scotts Peak Road. Travellers are advised to avoid driving in reserves at night due to the presence of native wildlife; drivers should proceed cautiously and remain vigilant for animals on the road.
To navigate from Hobart to Huon Campground, use Google Maps to locate the campground. The trailhead car park, which signals the beginning of the Port Davey Track, will be on the right just before reaching the campground. Scotts Peak Dam Road is accessible to all vehicles, though it can occasionally become corrugated and potholed.
Most hikers choose to drive to Huon Campground and camp overnight before commencing their hike the following day. For those without a car, shuttle services are available upon request. Various organisations offer on-demand shuttles, which typically require a minimum number of passengers to operate.
Shuttle services include options that will collect passengers from Hobart CBD or the airport and transport them to the Western Arthur trailhead. While these services may be expensive, they can sometimes be more cost-effective than renting a car for the duration of the hike. The shuttle bus, for example, requires a minimum of four passengers or the payment of a fee equivalent to four passengers for smaller groups. This service also offers hiking gear rentals.
For those preferring not to tackle the Western Arthurs Traverse independently, guided tours are available. These tours cater to experienced hikers and include all necessary food and some hiking equipment, providing a suitable alternative for travellers lacking their own gear.
Climate
The climate in the Arthur Range is notoriously unstable and unpredictable. Weather conditions can shift rapidly, with sunshine, heavy rain, clouds, strong winds, and even snow all occurring within the same day. The range is classified as Sub-Alpine or Alpine, with snow often capping the mountains in winter. Snowfall can happen in any season, though summer snowfalls rarely settle.
The climate is heavily influenced by prevailing winds, causing temperatures to fluctuate quickly with the arrival of warm air from Northern Tasmania or cold air from the Southern Ocean and Antarctica. The Arthur Range is subject to some of the most severe weather patterns, including the Roaring Forties—a belt of gale-force westerly winds between 40° and 50° latitude in the Southern Hemisphere. This region experiences rain on about 250 days each year, with conditions that can rival some of the most extreme weather globally.
For those planning to hike in this rugged wilderness, it’s crucial to be prepared for a wide range of weather scenarios. The best time to undertake a hike in the Arthur Range is from December to March, although snow, high winds, and heavy rain are possible year-round. Adequate storm-worthy shelter and reliable wet weather gear are essential, and a flexible attitude toward the unpredictable conditions will be invaluable.
Before setting out, it is essential to understand the weather forecast for the duration of the walk, with Strathgordon being a recommended town for checking the forecast for the Western Arthur Range Traverse. Observing sunrise and sunset times is also important. I recommend using the following weather platforms to monitor conditions: BOM (Bureau of Meteorology), Windy Weather, Mountain Forecast, and WillyWeather.
Personal Note: During my own trek, I found WillyWeather, Mountain Forecast, and Windy to be quite effective. Their forecasts were fairly similar, so I took a daily average across them for the week we were there. The first four days were really accurate, but by days five and six, the forecasted rain never eventuated, although the temperature predictions remained spot on. Overall, I’d be fairly confident in using these platforms. I also averaged data between Scott’s Peak, Fed, and Hartz stations, given they are the closest to the range.
Best Season to Walk: December to March. Snow, high winds, and heavy rain are possible at any time of year.
Safety
When undertaking alpine walks in Tasmania, such as those at Cradle Mountain, Frenchmans Cap, Walls of Jerusalem, and in the Southwest, it is crucial to be well-prepared. Essential gear includes a waterproof jacket with a hood and storm front made from seam-sealed, breathable fabric like Gore-Tex, waterproof over-trousers, sturdy walking boots, and warm clothing such as a fleece or merino top, thermal base layers, a hat, and gloves.
Fatal incidents have occurred when individuals were caught unprepared in cold, wet, and windy conditions. Those particularly at risk include children, older individuals, and those with health conditions or disabilities. Understanding the dangers of hypothermia and being well-prepared is vital.
Track signs are provided for safety and must be observed. It is important to stay on designated walking tracks both for personal safety and to protect the sensitive alpine environment. The Western Arthur Range Traverse, featuring 21 rugged peaks over 1000 meters in elevation, presents significant challenges. This multi-day Grade 5 wilderness track is suited only for experienced walkers proficient in navigating steep cliffs, rock scrambling, and extreme weather conditions. The track is not clearly marked in many sections, so navigation skills with a map and compass are essential.
Mobile phones should not be relied upon for communication, as cellular service is often unavailable. Rapid changes in weather can occur, particularly in remote national parks, and failure to make prudent decisions may result in serious injury or death. Creeks can rise quickly after rainfall, especially in the Arthur Plains area. Crossings should only be attempted when it is safe, and walkers should be prepared to wait for water levels to subside.
Walkers are responsible for their own safety and must ensure they have the necessary experience, fitness level, and self-sufficiency for remote bushwalking. Adequate clothing and equipment to protect against exposure to cold, wet, wind, and heat, along with sufficient food, are essential. For guidance on what to pack, refer to the relevant packing lists under the preparation and gear section below. Always check for alerts in the area before departure. In case of emergencies, Tasmania Police manages Search and Rescue operations, and the emergency number is 000.
Before heading into remote national parks like the Western Arthurs, always let someone know your plans. You can use the online trip intentions form to do so.
Know Before You Go
Facilities along the track are minimal. However, Huon Campground provides essential amenities, including toilets, parking, and water. Additional toilets are located at Junction Creek, Lake Cygnus, Lake Oberon, High Moor, and Haven Lake.
Adherence to the Leave No Trace principles is essential, requiring hikers to bury faecal waste 15 to 20 cm deep and at least 100 metres from water sources, camps, and tracks. A small trowel should be carried for this purpose.
There are no huts along the track. Some campsites feature tent platforms to protect the sensitive alpine vegetation. It is important to review the Walker Pack List to ensure all food and essentials are packed. For challenging sections of the track, carrying 20 metres of rope may be necessary to assist with hauling packs.
Consult the Safety in Parks page to prepare adequately for this hike. As the area is designated as Fuel Stove Only, open fires are prohibited. For more information on this restriction, refer to the Fuel Stove Only Areas webpage.
Many hikers choose to carry a Personal Locator Beacon (PLB) for emergencies. PLBs can be hired from Service Tasmania shops in Hobart, Launceston, Burnie, and Devonport during weekdays, or from the Cradle Mountain, Lake St Clair, and Mount Field visitor centres, although availability may be limited. Contact 1300 135 513 for further details.
There are no permanent rangers on this track, but a Wilderness Ranger may be present during peak periods. To minimise environmental impact and maintain water quality, always use the provided toilets and follow the Leave No Trace principles where no facilities are available.
Preparation and Gear
The Western Arthurs Traverse is a remote and challenging adventure that demands thorough preparation and attention to weather conditions. It is essential to be well-equipped for extreme conditions and emergencies before starting the Eastern Arthur Range Traverse. Essential gear includes a large waterproof backpack with a pack liner, a 3-4 season-rated tent with both inner and outer layers, a sleeping bag rated to at least 0°C for coastal areas and -10°C for alpine conditions, a sleeping mat, sturdy hiking boots, gaiters, a fuel stove with fuel, high-energy food, quick-dry walking clothes, a toilet trowel, antibacterial gel, a personal locator beacon (PLB), a map, and a compass.
Carry a topographic map and compass to avoid relying solely on a GPS or phone, which may lose battery power. Offline digital maps can serve as a useful backup if your device has built-in GPS. A well-stocked first aid kit is crucial; guidance on its contents can be found here. Always carry a personal locator beacon. Reusable water bottles are recommended to reduce plastic waste, and a water filtration system is advisable for treating river water. A head torch with a minimum of 100 lumens and spare batteries is essential.
For longer hikes, where trails may be unstable and muddy, hiking boots are preferable over trail runners. Long pants or gaiters are necessary to protect against leeches, which are common in Tasmania. A down jacket and thermals are important for warmth, as mountain weather can be unpredictable. Rain gear, including a jacket and optional rain pants, provides additional protection in adverse conditions. Sun protection is also important due to stronger UV rays at higher altitudes. For overnight hikes, a tent, warm sleeping bag, and an inflatable mat are necessary, as mountain temperatures can drop significantly at night, even in summer. A cooking stove allows for hot meals after a long day, and emergency snacks ensure you have sufficient food. If you wish to capture the experience, bring a camera, but leave drones at home as they are not permitted in Parks.
Pack weight is critical for the Western Arthurs Traverse. A lighter pack enhances hiking comfort and safety, especially in rugged terrain. A heavy load can impede agility and increase the difficulty of navigating slippery rocks and root-laden cliffs in wet conditions.
It is also advisable to bring Gore-Tex repair tape and tent repair patches. Severe weather can cause issues with tents, and sharp vegetation can tear your clothes, which you are likely to wear throughout the trip. Having a small sewing kit can be invaluable for repairs, as encountering gear failure is a common experience on an extended trek like this.
Some sources suggest carrying rope for pack hauling purposes. However, if hikers are in good shape, possess strong scrambling skills, and their pack is not excessively heavy, rope may be unnecessary and could add to the pack weight, making the hike more strenuous.
Adhering to Leave No Trace principles is essential. Proper disposal of waste and the prohibition of campfires are crucial for preserving the environment.
Further Resources: For more detailed guidance on preparing for your hike, check out these resources:
- Planning Multi-Day Hikes: An Extended Wilderness Adventure: Learn how to plan and execute successful multi-day hikes, ensuring you’re prepared for every aspect of your adventure.
- Hike Planning and Packing Checklists: Make sure you don’t forget any essentials with these free comprehensive planning and packing checklists.
Food and Water
This is a wilderness trek where no food resupplies are available along the route. Hikers must carry all necessary provisions from start to finish. Although rushing is not recommended due to the rugged terrain, completing the full Western Arthurs Traverse within eight days is advisable. This approach allows for reduced pack weight by balancing longer daily hiking hours against the need to carry less food. It is crucial to be prepared for any weather conditions and to bring extra food for one or two additional days.
Water is generally plentiful, with numerous lakes providing a reliable source. However, on high-level sections such as the Beggary Bumps, it is essential to carry enough water to last four to five hours of strenuous hiking. Depending on the weather, water may also be available from soaks or springs along the track, but it is best to be cautious and not rely solely on these sources.
Get tips on creating a balanced and energy-packed menu for your hike, with a downloadable meal planner to help you organise your meals.
Mud and Staying on Trail – Leave No Trace
In Tasmania’s south-west, including the Arthur Range, trails are often extremely muddy, with conditions frequently exceeding ankle depth. This persistently wet environment means that mud is prevalent even at higher altitudes, except where bare rock is exposed. Given the region’s substantial precipitation, boggy conditions are common, particularly in low-lying areas. Hikers on the Western Arthurs Traverse will encounter mud throughout much of the route, with the most challenging stretch being the 19-kilometre section from Cracroft Crossing to Junction Creek.
To minimise environmental impact, hikers should avoid widening the trail by ‘braiding’ around muddy areas. This practice exacerbates erosion, damages vegetation, disrupts hydrology, and enlarges trails. Instead, hikers should accept the muddy conditions and proceed through them directly.
The area is also prone to Phytophthora, a pathogen causing root rot. To prevent its spread, it is important to stick to the main trail and wade through the centre of muddy sections. This approach helps reduce mechanical damage to plants and preserves the integrity of the trail.
Camping
The Western Arthur Range Traverse lacks hut facilities, so all walkers must carry their own quality tents, ideally rated for 3-4 seasons with both inner and outer layers. Single-person tents are discouraged for groups due to limited campsite capacity. While distances between campsites may appear short, the rugged terrain significantly increases travel times. It is advisable to allow ample time to reach campsites before dark.
The traverse features a series of established campsites at regular intervals, which can provide some relief from the challenging conditions. Most campsites are located in relatively sheltered areas with nearby water sources. Despite the harsh terrain, these sites offer opportunities to rest and replenish energy, particularly in adverse weather conditions.
At higher elevations, camping areas include timber platforms and modular toilets. While these features may not be aesthetically pleasing, they play a crucial role in preserving the fragile alpine environment, especially given the increase in hiking traffic. Most platforms are equipped with nails and pre-tied ropes to facilitate tent setup, but carrying additional guylines is recommended.
Camping is permitted throughout the traverse, but to minimise environmental impact, staying at designated campsites is advised.
- Huon Campground: Located at the trailhead near Scotts Peak Dam, this site offers ten forest-based, sheltered sites with non-treated water, toilets, picnic facilities, and fireplaces. Caravan access is also available.
- Junction Creek: Situated in a sheltered forest area, this site features a pit toilet and several good camping spots. The creek flows through a dry eucalypt forest, providing ample open spaces for tents. It can be crowded as it serves hikers on multiple tracks, but it is a suitable place to camp if departing later in the day from Scotts Peak Dam car park.
- Moraine A Camp: This site offers a few tent spaces with reliable water from a small stream at the base of Moraine A. The stream, flanked by a sandy beach, is ideal for a final water refill before tackling the ascent. The site lacks toilets.
- Lake Cygnus: This campsite, located near Lake Cygnus, includes four wooden platforms and a pit toilet. The site is sheltered by a rugged ridgeline and provides ample space for tent placement. There are two wooden platforms and additional tent space on black mats and the beach. Water is available from the lake or the streams flowing into it, with a filtration system recommended.
- Lake Oberon: Featuring four platforms and a pit toilet, this site is surrounded by a moss-covered forest. Each platform accommodates two tents, though the second platform is cramped. The nearby sandy cove can fit additional tents if needed. Water can be sourced from the river (filtering recommended) and streams.
- High Moor: Located beneath Mount Columba, this exposed site includes a pit toilet, wooden platforms, and tent sites. Water availability can be unreliable, but a small stream provides some resources. Two tent platforms connected by boardwalks help protect the surrounding vegetation, accommodating up to nine tents.
- Haven Lake: This campsite on the southern shore features four platforms, each suitable for two tents, and a pit toilet hidden in dense shrubbery. The site is sheltered on all sides except the south, with water sourced from the lake; a filtration system is advised.
- Lake Vesta: Located on the north-east shore of the lake, this site is not recommended for planned stays during the A-K traverse but may be used as an emergency site.
- Seven Mile Creek Campsite: A small clearing by the creek serves as an undesignated campsite. There are no toilets, so if staying here, walkers should ensure to dig a toilet at least 100 metres from the water source.
Frequently Asked Questions
How challenging is the Western Arthurs hike?
The Western Arthurs Traverse is a demanding trek, characterised by exposed sections that require scrambling up or down very steep terrain. It is suited for experienced hikers who are in excellent physical condition and equipped for all weather scenarios, including potential blizzards even during summer. Those who meet these criteria will find the Western Arthurs hike a rewarding experience.
Is rock climbing experience necessary for the Western Arthurs Traverse?
Rock climbing experience is not required for the Western Arthurs Traverse, but a high level of rock scrambling skill is essential. Scrambling involves using both hands and feet to navigate steep boulders and trees, and this skill will be frequently tested along the route.
What is the length of the Western Arthurs Traverse?
The full Western Arthurs Traverse covers approximately 79 kilometres and typically takes between 10 to 12 days to complete. The more commonly followed route, which exits via Kappa Moraine, is about 66 kilometres and generally takes 5 to 7 days.
Should I bring rope for the Western Arthurs hike?
Climbing rope isn’t necessary for the Western Arthurs Traverse, but it’s recommended by some sources to carry at least 5 metres of rope (para cord) for potential pack hauling. While you may not end up using it, having rope can provide extra peace of mind, especially in challenging weather conditions. Wet or icy terrain can make some sections more difficult, and rope could be useful in those situations. The sections that might require pack hauling are usually short, and packs can often be passed between group members if needed.
Is water available along the Western Arthurs Traverse?
Water is available at each campsite except High Moor, but sources are often lakes or stagnant streams, making a water filtration system highly recommended. The trail between Lake Oberon and Haven Lake can be dry, with water sources limited to puddles or mountain runoff. High Moor has a small, occasionally dry stream. Checking water levels at the Mt Field Visitor Centre before starting the hike is advisable.
Is the Western Arthurs Traverse worth the effort?
The Western Arthurs Traverse traverses Tasmania’s most enchanting mountain range, featuring hanging valleys, glacially carved cirques with pristine alpine lakes, and challenging boulder fields. The effort required is well compensated by the unique and otherworldly experience of the Western Arthur Range.
Can I hike the Western Arthurs solo?
Solo hiking the Western Arthurs is feasible for those with extensive solo hiking experience and the capability to manage pack hauling independently. However, this hike is considerably safer when done with a partner, as the remote and rugged terrain is unforgiving. Plenty can go wrong, and having a second pair of eyes to help spot cairns and stay on track is invaluable. Assistance from other hiking parties should not be relied upon. If you can find a motivated hiking partner, it’s worth the effort for the added safety and support. Before heading into remote national parks like the Western Arthurs, always let someone know your plans. You can use this online trip intentions form to do so.
Do I really need to book?
Yes, booking is essential for several reasons. It has become increasingly common for hikers to arrive at camp only to find their reserved tent platform occupied by others who did not respect the booking system. This can lead to a frustrating experience after a long and challenging day on the trail. The tent platforms are installed to protect the environment and ensure everyone has a safe and enjoyable experience. When hikers do not adhere to the reservation system, it not only affects those who have followed the rules but also undermines efforts to maintain the natural beauty and sustainability of the area. By booking in advance and respecting the reservation system, you help ensure that your camping spot is available and contribute to a more organised and environmentally responsible hiking experience for everyone.
Do I need to register separately for Western Arthur Range Traverse and Eastern Arthur Range Traverse? Or can I register for the full traverse?
You need to book them separately. The Western Arthur and Eastern Arthur sections are considered distinct areas, each requiring its own registration. Please ensure you book your permits for both sections if you plan to traverse the entire Arthur Range. You can find more details and complete your bookings for Western Arthur’s here and Eastern Arthur’s here.
Culture and History
The Arthur Range lies within the traditional lands of the South-West Nation of the Aboriginal Tasmanian people, known traditionally as Loinnekumme (LOINNE.KUM.ME). The range was renamed by George Augustus Robinson in honor of Governor George Arthur after Robinson ascended Mount Frederick (now Mount Hayes) in March 1830.
The Western Arthurs, the most prominent range in South West Tasmania, has long attracted attention. The higher peaks were likely regularly climbed by the Aboriginal people. The first recorded ascent of the range was by Robinson in 1830, who climbed Mount Hayes with the assistance of the Aboriginal people while traveling around the southwest coast collecting Aboriginal people for re-settlement.
Early explorers and bushwalkers frequently climbed the main peaks from the plains. Some walkers speculated whether a traverse of the crest of the range was possible, and in December 1960, the first full traverse of the Western Arthur Range was completed. This achievement quickly became a classic walking route and has remained popular ever since. In the late 1960s, the Hobart Walking Club proposed naming the unnamed peaks, lakes, and mountains after celestial bodies. This proposal was accepted, resulting in names like Mount Orion, Mount Procyon, Mount Sirius, Lake Mars, Lake Oberon, and Crags of Andromeda. Initially, the peaks were referred to by numbers, and the morainal ridges on the northern side by letters. Over time, the peaks were given formal names, often from stars in the zodiac, while many of the lakes were named after planets and moons. More recently, some ridges were renamed using Greek rather than Roman letters.
In the early 1960s, visiting the Western Arthurs involved a three-week bushwalk, as the closest roads were near the Huon River or Maydena. At that time, the entire southwest was largely unknown to the general population of Tasmania and was not protected or reserved. However, in 1968, following the controversial flooding of Lake Pedder, the South West National Park was created, with the Western Arthur Range as its core feature. The flooding of Lake Pedder also led to the creation of the road to Scotts Peak Dam, providing closer access to the Western Arthur Range and shortening the traverse to a 7 to 10-day bushwalk. In 1982, the national park gained further protection and recognition when it was listed as part of the World Heritage Area.
About the Southwest National Park
Southwest National Park, the largest wilderness area in Tasmania, is a remote and rugged landscape within the Tasmanian Wilderness World Heritage Area. This region, known for its majestic Huon pine, sassafras, celery top pine, and myrtle, is characterised by the distinctive aromas of the Tasmanian forest. The park features a variety of landscapes including rocky coastlines, windswept beaches, dramatic mountain ranges, deep harbours, and expansive buttongrass plains, all of which are home to unique plant and animal species.
The cultural heritage of southwest Tasmania is deeply rooted in its Aboriginal history. Evidence of Aboriginal life, such as midden sites, artefact scatters, hut depressions, and rock shelters, reflects over 35,000 years of human presence. These sites provide links to the traditional practices of hunting, gathering, trading, and cultural ceremonies. Rich resources, including shellfish, crayfish, seabirds, eggs, game, seals, and plant foods, have long sustained the region’s inhabitants. The South Coast Track may follow ancient travelling and trading routes used by Aboriginal people.
European exploration of the area began in 1792 with Bruni D’Entrecasteaux and his crew, who entered what is now known as Recherche Bay. By the 1830s, this bay had become a hub for whaling, coal mining, and sawmilling. Further west, in the Port Davey and Bathurst Harbour regions, timber cutters harvested Huon pine while whales and seals were hunted along the coast.
The 1870s saw the beginning of recreational exploration in the south-west, a trend that has steadily grown over time. In the 1930s, the King family arrived at Melaleuca to start tin mining. Charles King and his son Deny welcomed bushwalkers and other visitors to this remote part of Tasmania. Deny King, a skilled bushman, naturalist, and artist, lived in Melaleuca until his death in 1991. His story can be explored at the Deny King Heritage Museum near the airstrip.
The controversial damming of Lake Pedder in 1972 led to the declaration of Southwest National Park in 1976, and the area was included on the World Heritage List in 1982 as part of the Tasmanian Wilderness World Heritage Area. This designation helps preserve the unique ecosystems and provides visitors with opportunities to explore and connect with nature.
Fauna in the Western Arthurs is relatively sparse. Skinks (lizards) are common, and ducks or grebes may be seen on the lakes. Mice, yabbies (crayfish), and the ever-present currawong are also typical. Larger animals, such as wombats, wallabies, possums, and quolls, are infrequently spotted in the mountains as they prefer the plains and are generally nocturnal. Venomous species include occasional small white-lipped snakes in the mountains and tiger snakes at lower elevations.
The flora of the region includes a diverse range of trees, shrubs, cushion plants, and grasses. Notable tree species are Myrtle Beech (Nothofagus cunninghamii), Leatherwood (Eucryphia milliganii), King Billy Pine (Athrotaxis selaginoides), and occasionally Tasmanian Lancewood (Eucryphia lucida). Rare trees such as Deciduous Beech (Nothofagus gunnii) and stunted varieties like Varnish Gum (Eucalyptus vernicosa) and Black Peppermint (Eucalyptus nitida) are also present. Shrubs include Spreading Richea (Richea sprengelioides), Scoparia Richea (Richea scoparia), Tasmanian Savory (Archeria serpyllifolia), and Mountain Everlasting (Orites milliganii). Cushion plants like Tiny Donatia (Donatia novae-zelandiae), Pink Pincushion (Dracophyllum minimum), and A. forsterioides are also found.
Tussock grasses such as Poa spp., Hierochloe spp., and Danthonia spp., along with other plants like Lawrencella (Pterygopappus lawrencii), Pink Swamp Heath (Epacris serpyllifolia), Shiny Astelia (Astelia alpina), Heatherberry (Ewartia meridithae), White Mignonette (Milligania densiflora), Curved Sedge (Carpha curvata), Slender Cord-rush (Empodisma minus), and Flattened Rope-rush (Restio complanatus) contribute to the region’s rich botanical diversity.
Lakes, Peaks and Side-trips
The traverse offers spectacular and challenging ridge walking across Tasmania’s most glaciated mountain landscape. Hikers will encounter high-altitude glacial lakes, endemic sub-alpine flora, and have opportunities for extraordinary side trips to high peaks.
Glacial Lakes
The Western Arthur Range is home to numerous lakes, many of which were shaped by glacial activity from the ice age. These include:
- Lake Fortuna
- Lake Pluto
- Lake Neptune
- Lake Cygnus (Designated campsite)
- Lake Nereid
- Lake Triton
- Lake Ceres
- Square Lake
- Lake Oberon (Designated campsite)
- Lake Uranus
- Lake Titania
- Lake Ariel
- Lake Dione
- Lake Miranda
- Lake Saturn
- Lake Mimas
- Lake Ganymede
- Lake Callisto
- Haven Lake (Designated campsite)
- Lake Jupiter
- Lake Sirona
- Lake Vesta
- Lake Juno
- Promontory Lake (Designated campsite)
- Lake Mars
- Lake Venus
- Lake Rosanne (Designated campsite)
Prominent Peaks
The range also features several prominent peaks from Alpha Moraine through to Kappa Moraine:
- Mount Hesperus (1098m)
- Capella Crags (1049m)
- Mount Hayes (1119m)
- Procyon Peak (1136m)
- Mount Orion (1151m)
- Mount Sirius (1151m)
- Mount Pegasus (1063m)
- Mount Pegasus South (1053m)
- Mount Capricorn (1037m)
- Dorado Peak (1068m)
- Mount Columba (1042m)
- Beggary Bumps (1006m)
- Mount Shaula (914m)
- Mount Taurus (1011m)
- Mount Aldebaran (1107m)
- Mount Scorpio (1106m)
Side-trips
Several notable side-trips offer some of the best views along the Western Arthur Traverse:
- Lake Fortuna: 800 metres return, approximately 40 minutes. (Stage 2 between Junction Creek and Lake Cygnus)
- Mount Hayes: 600 metres return, approximately 40 minutes. (Stage 3 between Lake Cygnus and Lake Oberon)
- Mount Sirius: 800 metres return, approximately 30 minutes. (Stage 3 between Lake Cygnus and Lake Oberon)
- Mount Orion: 800 metres return, approximately 45 minutes. (Stage 3 between Lake Cygnus and Lake Oberon)
- Dorado Peak: 1.2 kilometres return, approximately 2 hours. (Stage 4 between Lake Oberon and High Moor)
- Mount Columba: 500 metres return, approximately 15 minutes. (Stage 4 or 5 between Lake Oberon and High Moor)
- Mount Aldebaran: 2.2 kilometres return, approximately 2-3 hours. (Stage 5 or 6 between High Moor and Haven Lake)
- Mount Scorpio: 100 metres return, approximately 15 minutes. (Stage 6 between Haven Lake and Moraine K)
- Carina Peak: 1.4 kilometres return, approximately 1 hour (Stage 6 between Moraine K and Promontory Lake)
- Mount Canopus: 3.2 kilometres return, approximately 3 hours (Stage 7 between Promontory Lake and Lake Rosanne)
- Lake Venus: 600 metres return, approximately 15 minutes (Stage 7 between Promontory Lake and Lake Rosanne)
- West Portal: 800 metres return, approximately 45 minutes (Stage 7 between Promontory Lake and Lake Rosanne)
More Information
For detailed information on each route, including the full Western Arthurs Traverse and the shorter A-K option, as well as my comprehensive trip report, please refer to the following links:
Photo Gallery
/Western-Arthurs-Traverse-A-K-Hike_166.jpg)
/Western-Arthurs-Traverse-A-K-Hike_135.jpg)
/Western-Arthurs-Traverse-A-K-Hike_279.jpg)
/Western-Arthurs-Traverse-A-K-Hike_28.jpg)
/Western-Arthurs-Traverse-A-K-Hike_69.jpg)
/Western-Arthurs-Traverse-A-K-Hike_324.jpg)
/Western-Arthurs-Traverse-A-K-Hike_307.jpg)
/Western-Arthurs-Traverse-A-K-Hike_189.jpg)
/Western-Arthurs-Traverse-A-K-Hike_287.jpg)
/Western-Arthurs-Traverse-A-K-Hike_93.jpg)
/Western-Arthurs-Traverse-A-K-Hike_67.jpg)
/Western-Arthurs-Traverse-A-K-Hike_101.jpg)
/Western-Arthurs-Traverse-A-K-Hike_371.jpg)
/Western-Arthurs-Traverse-A-K-Hike_32.jpg)
/Western-Arthurs-Traverse-A-K-Hike_18.jpg)
Plan carefully, hike safely: These guides are for inspiration and general planning only. Trails can change, conditions vary, and you are responsible for your own decisions, preparation, and safety. Use judgement, maps, and the Hiking Safety Systems to help you prepare effectively.
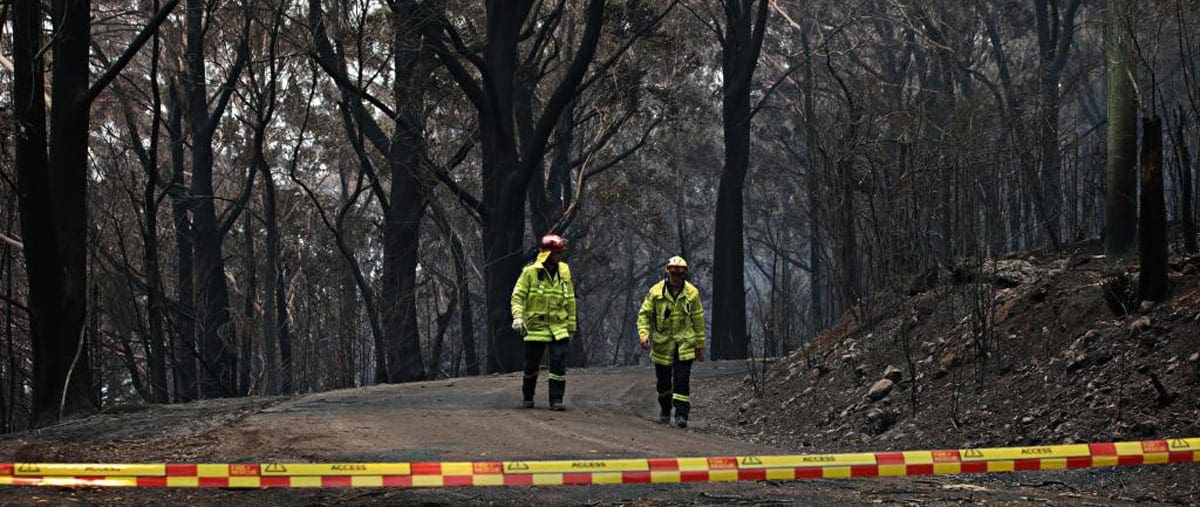


The WA Traverse is one of the toughest walks I’ve done. I created this planning guide in the hope it will help people make informed decisions and prepare for (or decide not to undertake) this amazing adventure.
Trail Hiking Australia thanks. Hope to do it one day not so far in the future
Hisham Mstfa it’s an incredible adventure. We were really lucky to have had amazing weather every day. Don’t know my memories would be quite the same if the weather had turned.
Ashley Goldstraw