I think taking a bearing from a map is one of the more underrated navigation skills, because it lets you move deliberately from one known point to another even when there’s no visible track or landmark to follow. It’s the process of turning what’s on the map into a precise direction you can actually walk, and done correctly it replaces guesswork with something repeatable and verifiable.
A bearing is expressed in degrees, measured clockwise from north, from 0 to 360. I use it to control direction over distance, particularly in poor visibility, featureless terrain, dense bush, or off track, and understanding how to take one from a map properly is something you need before you ever rely on a compass in the field.
What a bearing represents
A bearing is a fixed direction, not a vague heading or a general sense of where to go. Take a bearing of 120 degrees and it stays 120 degrees whether you’re standing still, moving forward, or relocating to another point along the same line. That consistency is the whole point.
On a map, a bearing is the angle between north and the straight line connecting two points. On the ground, it’s the direction your compass needle has to align with to follow that same line in real space. What makes a bearing valuable is that it lets you move accurately even when you can’t see the destination.
The map comes first
A topographic map gives you the fixed reference you need to calculate a bearing in the first place. Australian topographic maps are printed with a north-south grid, usually based on the Universal Transverse Mercator system, and these grid lines represent grid north, which is what you use when taking a bearing from the map.
Taking a bearing from a map isn’t guessing direction by eye. You’re using the map’s grid and scale to establish an exact line of travel between where you are and where you’re going, and that only works if you can identify both points on the map accurately before you start.
The compass as a protractor
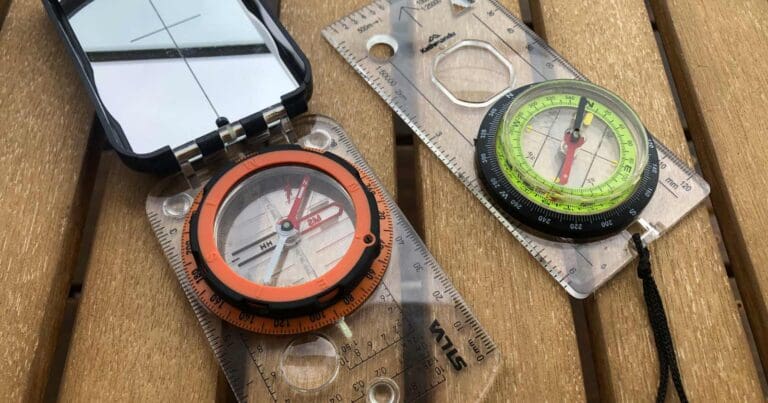
At this stage the compass is a protractor, not a direction-finding device, and the magnetic needle doesn’t matter yet. What matters is the baseplate, the direction-of-travel arrow, the rotating housing, and the orienting lines inside it.
The compass measures the angle between the map’s north-south grid and the line connecting your two points. That angle, in degrees, is the bearing you’ll follow later on the ground. Confusing this step with actually following a bearing in the field is an easy mistake to make, and it leads to errors, because they’re genuinely two separate tasks even though they use the same tool.
Taking the bearing, step by step
Once I know my starting point and destination, taking the bearing itself is a short, mechanical sequence, and it’s worth doing it the same way every time rather than improvising.
- Identify your starting point and your destination on the map precisely, whether that’s a track junction, a contour feature, a creek crossing, or a grid reference. Rushing this step is one of the most common causes of navigation errors: if either point is wrong, the bearing will be wrong no matter how carefully you take it afterwards.
- Place the compass on the map so the long edge of the baseplate connects your starting point to your destination, with the direction-of-travel arrow pointing from where you are to where you want to go. This sets the intended line of travel on the map.
- Rotate the compass housing until the orienting lines inside it are parallel with the map’s north-south grid lines, with the orienting arrow pointing toward the top of the map. Ignore the magnetic needle completely at this stage.
- Read the bearing at the index line on the compass housing. That value is the grid bearing from your starting point to your destination.
The alignment step is the one that matters most. If the housing isn’t accurately lined up with the grid, the bearing will be wrong, and small alignment errors on the map turn into large deviations on the ground once you’ve walked any distance on them. The bearing you read represents the exact direction you’d need to travel if the terrain were flat, open, and unobstructed. In real hiking conditions it becomes the reference you manage and adjust around obstacles, not a line you follow with your eyes closed.
Why this matters, and where it goes wrong
Taking a bearing from a map lets you move with intent rather than hope. Visual cues in the Australian bush can be unreliable: ridges look continuous but fade into spurs, creeks split or disappear underground, and vegetation can block your sightline completely. A bearing gives you a controlled line of travel that doesn’t depend on any of that, and it lets you check direction regularly and correct small errors before they become big ones, which matters most in poor weather, low light, or unfamiliar terrain.
Most of the errors I’ve seen happen at the map stage rather than out on the ground. Aligning the compass housing with the edge of the map instead of the printed grid lines is one, because map edges aren’t a reliable reference and aren’t always perfectly aligned with grid north. Reversing the direction-of-travel arrow is another: if it points from the destination back to the start, the bearing comes out 180 degrees wrong, and that mistake often goes unnoticed until the terrain stops matching what you expected. Failing to fully align the orienting lines with the grid is the quieter version of the same problem, since even a slight misalignment can lead you gradually off course over distance without ever feeling like an obvious error.
Grid north versus magnetic north
When you take a bearing from a map, you’re working in grid north, not magnetic north. Australian maps show the difference between grid north and magnetic north as magnetic declination, and that difference has to be accounted for before you follow the bearing on the ground.
Taking a bearing from the map and following it in the field are two separate steps. The bearing you take from the map is correct within the map’s own reference system. Converting it for use with the compass needle happens later, deliberately, not as an afterthought.
When it’s worth doing
Taking a bearing from a map earns its place most when you’re navigating off track, crossing open country, or moving between features that aren’t connected by a formed route. It’s essential for planning escape routes, alternative lines of travel, or safe directions in poor conditions.
Even on track, I still find it useful. Knowing the bearing of a section of track helps confirm where you are, anticipate changes in terrain, and pick up on a wrong turn faster than you would otherwise.
Building reliability into the process
I don’t treat taking a bearing as a single, one-off action. It works best combined with regular position checks, terrain awareness, and confirmation against map features, because the bearing gives you direction, but the map still tells you where you are and what to expect along the way.
A well-taken bearing, grounded in accurate map reading, buys you a safety margin. It lets you move with confidence when conditions aren’t ideal, and it gives you a clear reference point the moment something doesn’t feel right.
Taking a bearing from a map was never about precision for its own sake, for me. It’s about control: a clear plan before you move, and a way to check whether that plan is actually working once you do. In Australian hiking conditions, where tracks can fade and visibility can change quickly, it remains one of the most reliable tools you can carry. Once you can consistently take a correct bearing from a map, you’re no longer relying on luck, signage, or perfect conditions. You’re navigating deliberately, with map and compass working together to keep you on course.