On overnight and multi-day hikes, lightweight food planning often prioritises carbohydrates, fats and calorie density, for good reason. But over several days, meals dominated by grains, bars and packaged foods can get monotonous and nutritionally narrow, and I’ve hit that wall myself on longer trips.
Dehydrating vegetables lets you add flavour, colour, texture and micronutrients to trail meals without adding much pack weight. Remove the water before you leave and you carry only a fraction of the original weight, then restore much of the food’s volume when it’s cooked at camp.
Drying doesn’t improve the quality of food. It preserves what you start with. Choose fresh, undamaged vegetables and process them promptly to get safe, stable and appealing results.
Vegetables that dry well
Many vegetables dehydrate successfully for hiking meals. Some rehydrate more readily than others, while starchy or dense vegetables often do better fully cooked before drying.
Vegetables and other ingredients that consistently produce good results include:
- Carrots
- Capsicum
- Garlic
- Mushrooms
- Onions
- Parsley and other herbs
- Parsnips
- Peas
- Potatoes
- Sweet corn
- Tomatoes
High-moisture vegetables such as tomatoes generally need longer drying times and more careful storage, because they readily reabsorb moisture from the air.
Preparing vegetables for dehydration
Wash vegetables thoroughly under running water and remove bruised, damaged or deteriorated areas. Peel where necessary and cut into consistently sized pieces. For most sliced vegetables, aim for a thickness of approximately 3 to 6 mm. Vegetables can also be finely diced when they’ll be added to soups, pasta, couscous or rice dishes. Uniform pieces dry more evenly and reduce the chance of some pieces hiding moisture that hasn’t actually gone.
Blanching vegetables
Most vegetables benefit from blanching before dehydration. Blanching slows the enzyme activity that can cause colour, flavour and texture to deteriorate during storage. Steam blanching is generally preferred because it causes less nutrient loss than boiling. Blanching times vary by vegetable and piece size, but are commonly between 2 and 5 minutes.
After blanching, cool the vegetables promptly in cold water, drain them thoroughly and pat them dry before arranging them on the dehydrator trays. Commercially frozen vegetables, including many frozen peas and corn kernels, have usually been blanched before freezing. They can often be dehydrated without further blanching, though it’s worth checking the product information where it’s available.
Cooking before dehydration
Blanching helps preserve food quality, but it doesn’t necessarily cook a vegetable until tender. Dense and starchy vegetables such as potatoes, carrots and parsnips may rehydrate more successfully if fully cooked before drying. Fully cooked vegetables usually soften more quickly at camp, cutting simmering time and fuel use, which matters on trips where fuel efficiency is tight. Acidulated water made with citric acid or lemon juice may reduce surface browning in some vegetables, but it’s not a substitute for thorough drying, hygienic preparation and appropriate storage.
Vegetable dehydration guide
The temperatures and drying times below are approximate. Actual results will vary depending on the dehydrator, humidity, vegetable variety, preparation method, tray loading and thickness of the pieces.
| Ingredient | Preparation | Pre-treatment | Temperature | Approximate drying time | Dryness test |
|---|---|---|---|---|---|
| Mushrooms | Clean and slice approximately 4 to 6 mm thick | None usually required | 55 to 60°C | 6 to 10 hours | Dry, leathery or crisp, with no softness or moisture inside |
| Peas | Shell fresh peas or use frozen peas | Blanch fresh peas; most frozen peas are already blanched | 55 to 60°C | 6 to 10 hours | Hard, shrivelled and dry throughout |
| Sweet corn | Remove kernels from the cob or use frozen kernels | Blanch fresh corn; most frozen corn is already blanched | 55 to 60°C | 6 to 12 hours | Hard, dry and slightly translucent |
| Carrots | Slice thinly or cut into a small, even dice | Blanch or cook until tender | 55 to 60°C | 6 to 10 hours | Hard, brittle or crisp |
| Onions | Dice or slice evenly | None usually required | 55 to 60°C | 6 to 12 hours | Dry and brittle |
| Capsicum | Remove the stem and seeds, then dice or slice | None usually required | 55 to 60°C | 8 to 12 hours | Leathery or brittle, with no internal moisture |
| Potatoes | Slice, dice, shred or mash | Cook fully before drying | 55 to 60°C | 6 to 12 hours | Hard, crisp or brittle throughout |
| Tomatoes | Slice evenly or cut small tomatoes into halves | None usually required | 55 to 60°C | 8 to 18 hours | Leathery or crisp, with no stickiness or internal dampness |
How to dehydrate mushrooms
Mushrooms are particularly useful in hiking meals because they add savoury flavour and dry down to very little weight. Button, cup, Swiss brown, portobello, shiitake and oyster mushrooms can all be dehydrated, though drying times and finished textures vary. Choose firm mushrooms without slimy patches, bruising or signs of deterioration. Brush away loose dirt or wipe them with a slightly damp cloth. They can also be rinsed briefly if necessary, but shouldn’t be left soaking in water.
Slice the mushrooms approximately 4 to 6 mm thick. Small mushrooms can be quartered, though thicker pieces will take longer to dry and may rehydrate less evenly. Arrange the mushrooms in a single layer without overlapping. Dry them at 55 to 60°C until completely dry. Depending on the variety and thickness, they may finish leathery, crisp or brittle. There should be no coolness, softness or moisture in the centre when a piece is broken open.
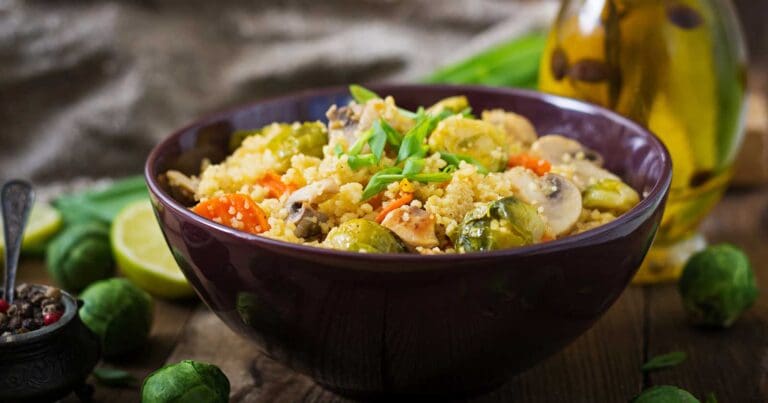
Dried mushrooms can be added directly to soups, pasta sauces, risotto, noodles and couscous dishes. They can also be ground into mushroom powder and used to add flavour to sauces, gravies and dehydrated meals, which is a trick I use to add depth to an otherwise plain rice dish.
How to dehydrate peas
Frozen peas are one of the simplest vegetables to dehydrate. They’re already shelled and have usually been blanched before freezing, which removes most of the prep work. Frozen peas can be thawed before drying, though some dehydrators can process them directly from frozen. Spreading them on a mesh liner can stop smaller peas falling through the tray as they shrink.
Fresh peas should be shelled, blanched for approximately 2 to 3 minutes, cooled promptly and drained thoroughly before dehydration. Arrange the peas in a single layer and dry at 55 to 60°C until hard, shrivelled and completely dry. Break or crush a few peas to confirm there’s no softness or moisture inside.
Peas rehydrate well in soups, stews and meals simmered for several minutes. They can remain firmer when added to meals prepared only by soaking, particularly in cold conditions.
How to dehydrate sweet corn
Sweet corn adds colour, sweetness and texture to hiking meals. Frozen corn kernels are convenient because they’ve generally been cleaned, separated and blanched before freezing. Fresh corn should be husked and blanched before the kernels are removed from the cob. Frozen kernels can usually be thawed, drained and placed directly onto dehydrator trays.
Spread the kernels in a single layer, using a mesh liner where necessary. Dry at 55 to 60°C until the kernels are hard, dry and slightly translucent. Corn often takes longer to rehydrate than softer vegetables and may stay slightly chewy. For softer results on the trail, corn can be cooked until tender before dehydration. It works well in rice dishes, soups, chilli, pasta, couscous and dehydrated mince meals.
How to dehydrate carrots
Carrots can be sliced, shredded or cut into a small dice. Smaller pieces are generally more practical for hiking meals because they dry more evenly and rehydrate faster. Blanch carrots before dehydration, or cook them until tender if you want them to soften more quickly at camp. Spread the prepared pieces evenly across the trays and dry at 55 to 60°C until hard or brittle. Shredded carrot works well in couscous, noodle dishes and soups, while diced carrot suits stews, pasta and rice meals.
How to dehydrate onions and garlic
Onions and garlic add substantial flavour for very little finished weight, which makes them one of the better value additions to a dinner bag. Peel and slice, dice or mince evenly before arranging on the trays. Blanching isn’t generally required. Dry at 55 to 60°C until the pieces are crisp or brittle with no remaining softness. The smell produced during dehydration can be strong and may transfer to other foods drying at the same time, so I dehydrate onions and garlic separately from milder ingredients such as fruit. Once completely dry, onions and garlic can be used as pieces or ground into powder. Store powders carefully, because their greater exposed surface area makes them more vulnerable to moisture absorption.
Drying vegetables in a food dehydrator
An electric food dehydrator gives the most consistent and controllable results. Spread food in a single layer and allow space for air to circulate around the pieces. Dry most vegetables at approximately 55 to 60°C. Rotate trays if your dehydrator has uneven airflow, and check smaller pieces first, since they may finish before larger pieces. Avoid pushing the temperature up to speed things along. Excessive heat can harden the outside of food before the centre is fully dry, trapping moisture inside.
Drying vegetables in an oven
Vegetables can be dried in an oven, though temperature control and airflow are generally less reliable than in a dedicated dehydrator. Use the lowest available oven setting, ideally around 60 to 65°C. Arrange the vegetables on lined racks or trays and leave enough space for air movement. The oven door may need to stay slightly open so moisture can escape. Monitor the oven carefully and follow the manufacturer’s safety instructions. Oven drying can be less energy efficient and may need more frequent checking and tray rotation.
How to test vegetables for dryness
Allow vegetables to cool before testing them. Warm food can feel softer than it will once cool, and may release small amounts of residual heat and moisture inside a storage container. Most vegetables should be hard, crisp or brittle, with no visible moisture when cut or broken open. Some high-moisture foods, including tomatoes and capsicum, may stay leathery rather than brittle. They still need to feel dry, with no stickiness, coolness or internal dampness. Test several pieces from different trays and different areas of the dehydrator. Don’t assume the whole batch is ready because one piece is dry, because that assumption is exactly how mould ends up in a sealed jar three weeks later.
Conditioning dried vegetables
Conditioning helps identify moisture that may remain in some pieces after drying. Once the vegetables have cooled completely, place them loosely in a clean, dry glass jar and seal it. Keep the jar at room temperature for approximately 5 to 7 days and shake it daily to redistribute the contents. Check for condensation, clumping or signs of moisture. If condensation forms, return the vegetables to the dehydrator and continue drying. Discard any food that develops mould.
Storage and shelf life
Store dried vegetables in clean, airtight containers in a cool, dry and dark location. Temperatures below 20°C are preferable for longer storage. Vacuum sealing can extend storage life but isn’t essential for food that will be used relatively soon. Zip-lock bags may suit individual hiking meals, provided the vegetables have been dried thoroughly and the bags are protected from punctures and moisture.
Dried vegetables readily absorb moisture from the air. Open larger containers only when necessary, or divide the food into smaller portions so the whole supply isn’t repeatedly exposed. Light can accelerate the deterioration of some vitamins and colours. Use opaque containers, store clear containers in a dark cupboard, or place clear meal bags inside a dark stuff sack while hiking. Properly dried and stored vegetables will often remain usable for 6 to 12 months, though quality gradually declines. Discard food that develops visible moisture, mould, unusual discolouration or an off odour.
Using dried vegetables in hiking meals
Dried vegetables can be added to:
- Soups and stews
- Rice and pasta dishes
- Couscous meals
- Instant noodles
- Dehydrated mince meals
- Freeze-dried meal enhancements
- Scrambled egg or powdered egg meals
Most vegetables rehydrate effectively when simmered for approximately 10 to 20 minutes. Dense vegetables may benefit from soaking before cooking. One practical approach is to put the vegetables in the cooking water while setting up camp, then cook the meal after they’ve soaked for 10 to 20 minutes. This can reduce cooking time and fuel consumption. Vegetables that were fully cooked before dehydration generally rehydrate faster than those that were only blanched.
How much water is needed for rehydration?
The amount of water required depends on the vegetable, particle size, drying method and intended meal. As a general starting point, use approximately one to two parts water for every one part dried vegetables by volume, then adjust as needed. When the vegetables are cooked as part of a soup, sauce or pasta meal, the rehydration water doesn’t need to be discarded. It becomes part of the finished meal and retains flavour and water-soluble nutrients. Avoid adding excessive water at the start. It’s easier to add more water during cooking than to remove surplus water when fuel and time are limited.
Weight, energy and water considerations
Dehydration removes water but doesn’t increase the total energy contained in the original vegetable. Vegetables become lighter and more compact, but they still provide relatively modest energy per gram compared with oils, nuts, cheese, chocolate and other calorie-dense hiking foods. For hiking efficiency, combine dried vegetables with carbohydrates, fats and protein. They’re best used to improve nutrition, texture and meal variety rather than as a primary source of trail energy.
Rehydration also creates a water demand. Carrying 50 g of dried vegetables may save substantial food weight, but preparing them could need an additional 100 to 200 ml of water depending on the vegetable and meal. In dry environments, I include this cooking and rehydration water in the water audit rather than assuming it’ll turn up from somewhere.
Vegetable dehydration is primarily a camp meal strategy rather than a moving fuel strategy. Unlike nuts, bars or dried fruit, most dried vegetables need water and heat before they’re pleasant to eat, which is why they suit evening meals better than daytime energy intake.
Common vegetable dehydration mistakes
- Cutting pieces unevenly: Large pieces may retain moisture after smaller pieces have finished drying.
- Overloading trays: Overlapping food restricts airflow and leads to uneven drying.
- Skipping blanching: Some vegetables can lose colour, flavour and storage quality if enzyme activity isn’t controlled.
- Using excessive heat: The outside may harden before the centre is dry.
- Testing food while warm: Warm vegetables can feel softer and may hide remaining moisture.
- Packing food before it cools: Trapped heat can create condensation inside the container.
- Storing mixed levels of dryness: Moisture from an under-dried piece can migrate through the entire batch.
- Ignoring rehydration time: Some vegetables remain firm unless soaked or simmered adequately.
- Forgetting the water requirement: Weight savings are less useful if the meal requires water that isn’t available.
Dried vegetables won’t be the thing that gets you up a climb, but they’re the difference between a trip where dinner is something you tolerate and one where it’s actually worth looking forward to, and that matters more over five or six days than it sounds like it should.





Have you tried dehydrating your own veggies for hikes? What’s your go-to method or favourite veggie to dry?
Mushrooms would be my pick. They dry down light, rehydrate well and add plenty of flavour to pasta, couscous, soups and dehydrated meals. Frozen peas and corn are also easy, reliable options for adding colour and texture.
My go to are mushrooms, peas & onions.
Ronnie Parle haven’t tried onions. Well at least not by themselves.
Trail Hiking Australia although it takes longer, it’s sometimes easier to prepare the veggies separately, then add to the zip lock bag. That way i don’t get ‘babyfood’ 😂🤣
Ronnie Parle excellent tip. Totally get the baby food reference. I’ll try that in future batches.